This is the third article of a series on the MakAir open-source ventilator, a project that I founded with friends, which was born at the beginning of the COVID-19 pandemic in early 2020. Think of this series of articles as a ledger of all that happened and all that was created. These articles could serve as the foundation of a project reboot in future years, in the event a similar pandemic was to emerge again.
This article describes the building blocks of a mechanical ventilator, in a high-level way. That is, it does not go too deep into the engineering concepts, which will be covered in later articles. The goal here is to describe how a ventilator works, and how all components interface together. Also, as regulatory & compliance requirements constrain how the machine gets designed, they will be listed and explained.
Looking up the definition of Mechanical Ventilation:
Mechanical ventilation, assisted ventilation or intermittent mandatory ventilation, is the medical term for artificial ventilation where mechanical means are used to assist or replace spontaneous breathing.
How a Ventilator Works
A ventilator is a machine that produces a target air volume at a given pressure. It regulates the air flow and pressure in real-time, in order to match the ventilation requirements of the patient, without compromising on safety.
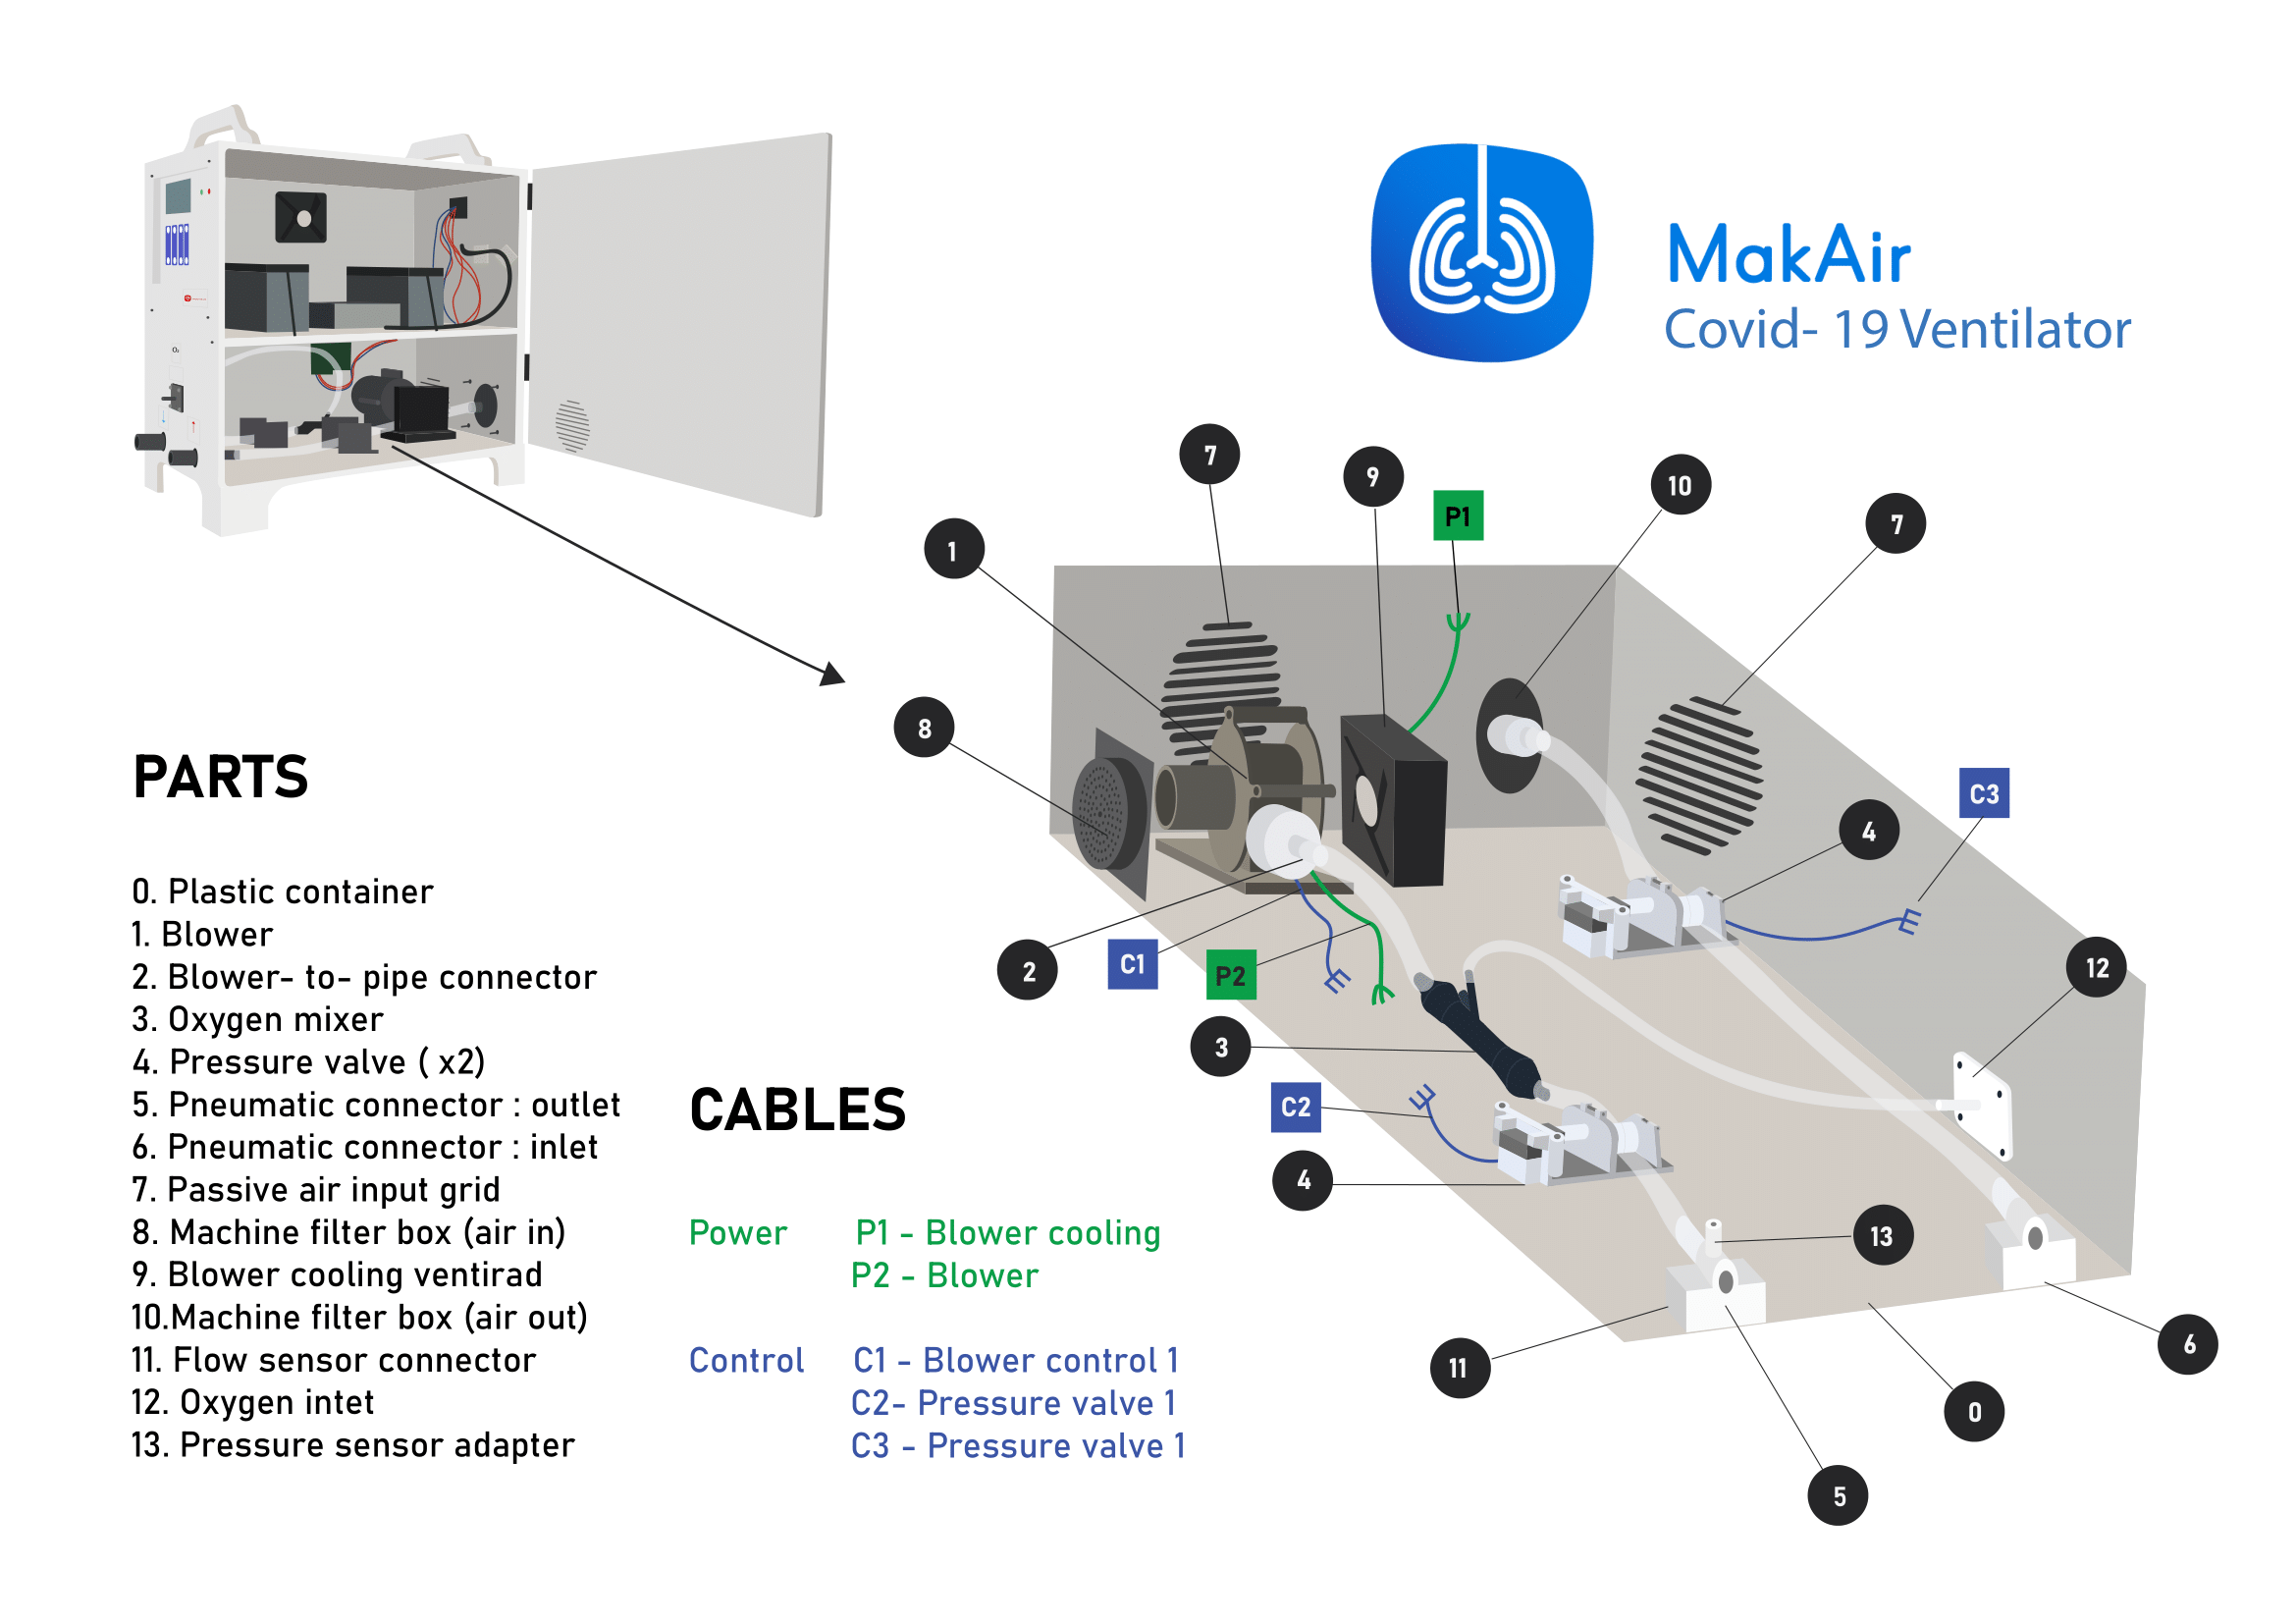
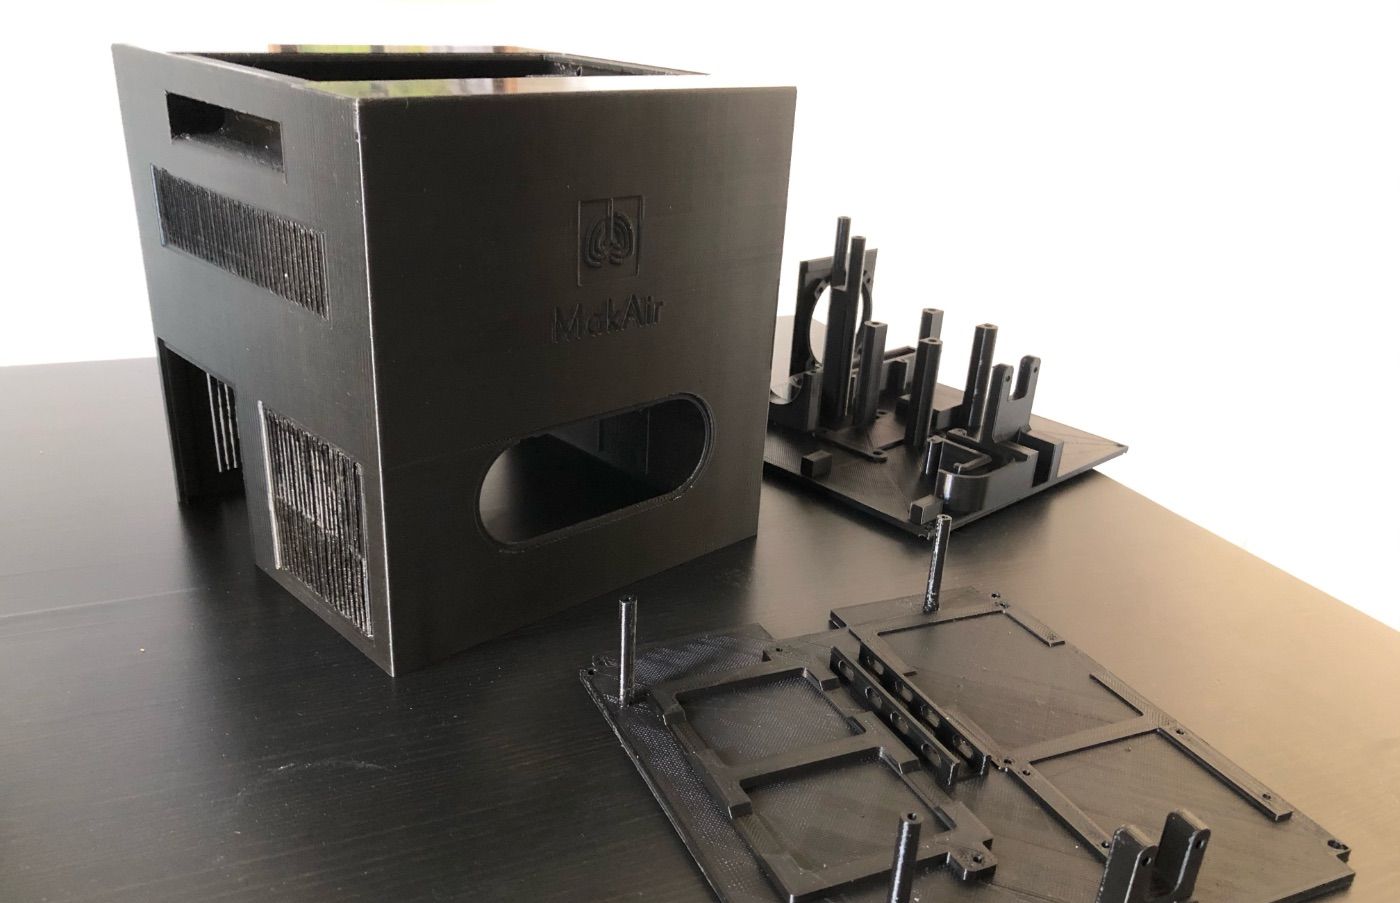
In order to produce air, multiple methods exist. While a ventilator could use a piston system, the most compact and flexible way to produce air is by using a turbine. Turbines, while noisy, are handy as they can be very precisely ramped up or down. While keeping a small form-factor, they are capable of producing 200 L/min+ of air.
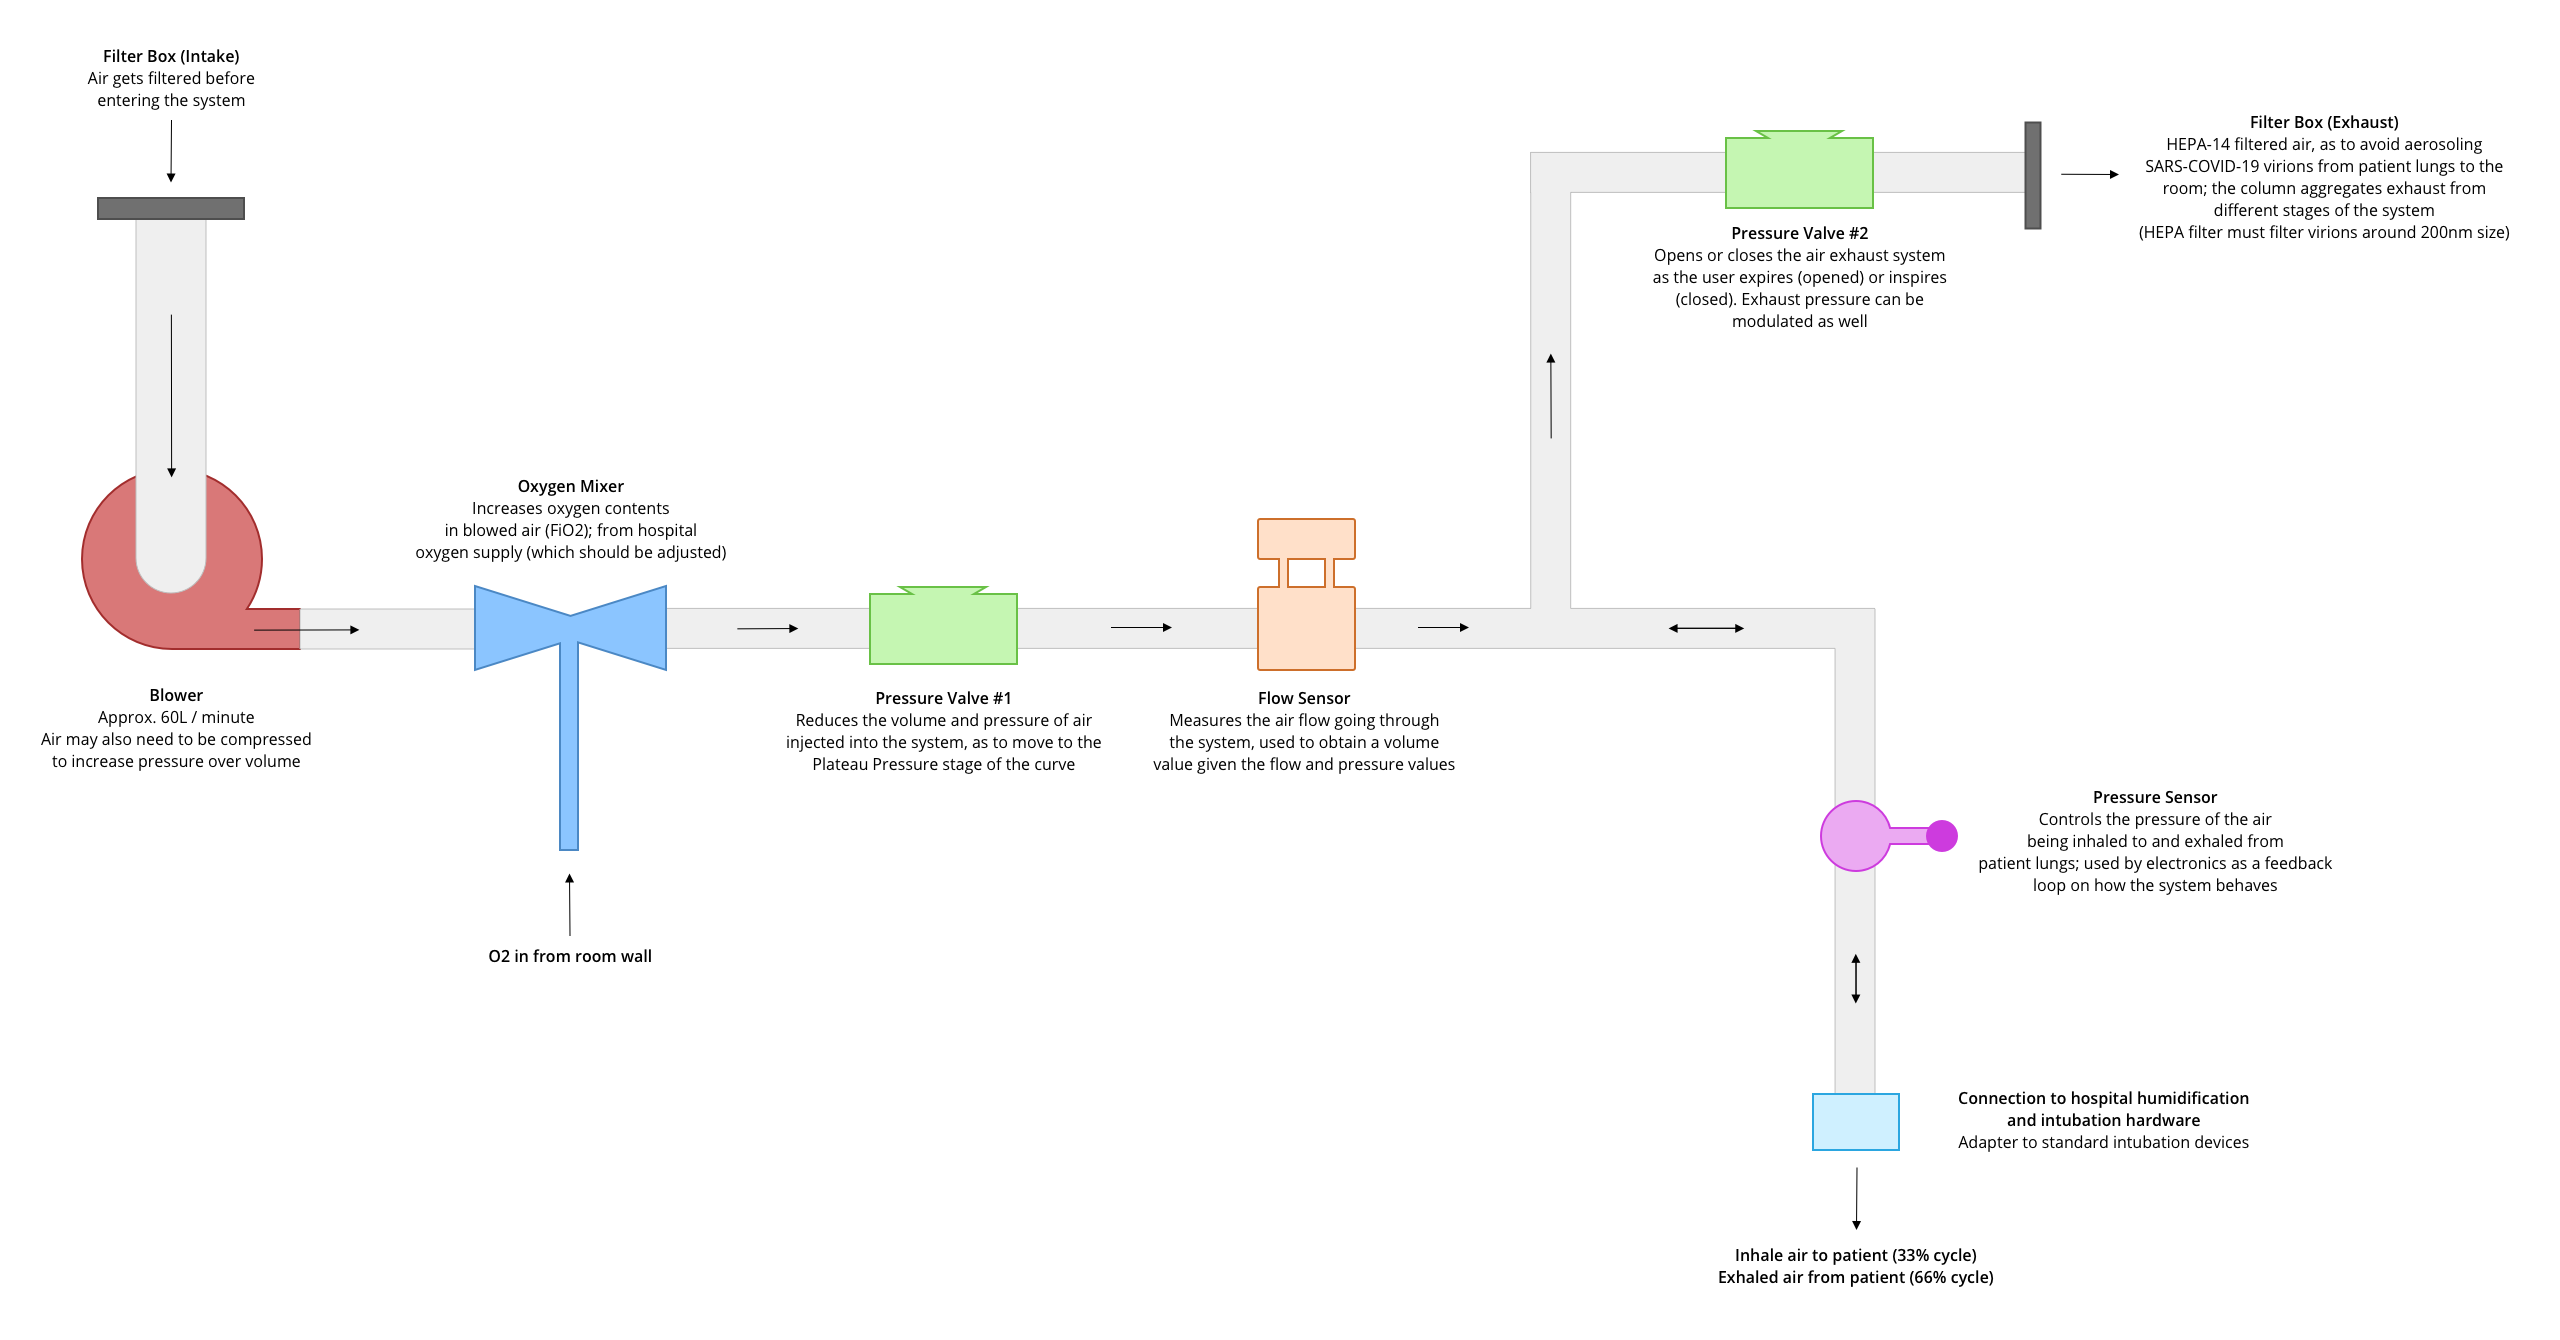
Now that air is produced, the respiratory cycle needs to be forced. This means that the ventilator would need to regulate how much air can come in or out (of the lungs) at any given time. In other words, in needs to increase or decrease the resistance in the inlet or outlet circuits. During an inspiratory cycle, the lungs inflate, thus the inlet circuit must be open, while the outlet circuit must be kept closed. In the hold phase (at the end of the inspiration), the inlet and outlet circuits must be closed, in order to retain air in the lungs. Then, during the expiratory cycle, the outlet must be opened while the inlet must stay close, that way the air gets out of the lungs.
Note that when “opened” or “closed” are mentioned, you should read “opened or closed to a certain degree”. Depending on the current state of the patient, all of the available air volume might not be blowed in or out of the lungs, hence why the ventilator needs to have a precise control of its pneumatics aperture.
In order to perform all that is listed above, the ventilator needs to be able to sense what is happening. To do so, it needs to measure in real-time the pressure in the inspiratory system (in cmH2O), as well as the air flow in the inspiratory and expiratory branches (in L/min). These measurements are fed to a control algorithm that regulates the aperture of the pneumatics (in degrees) and the blower turbine speed (in RPM).
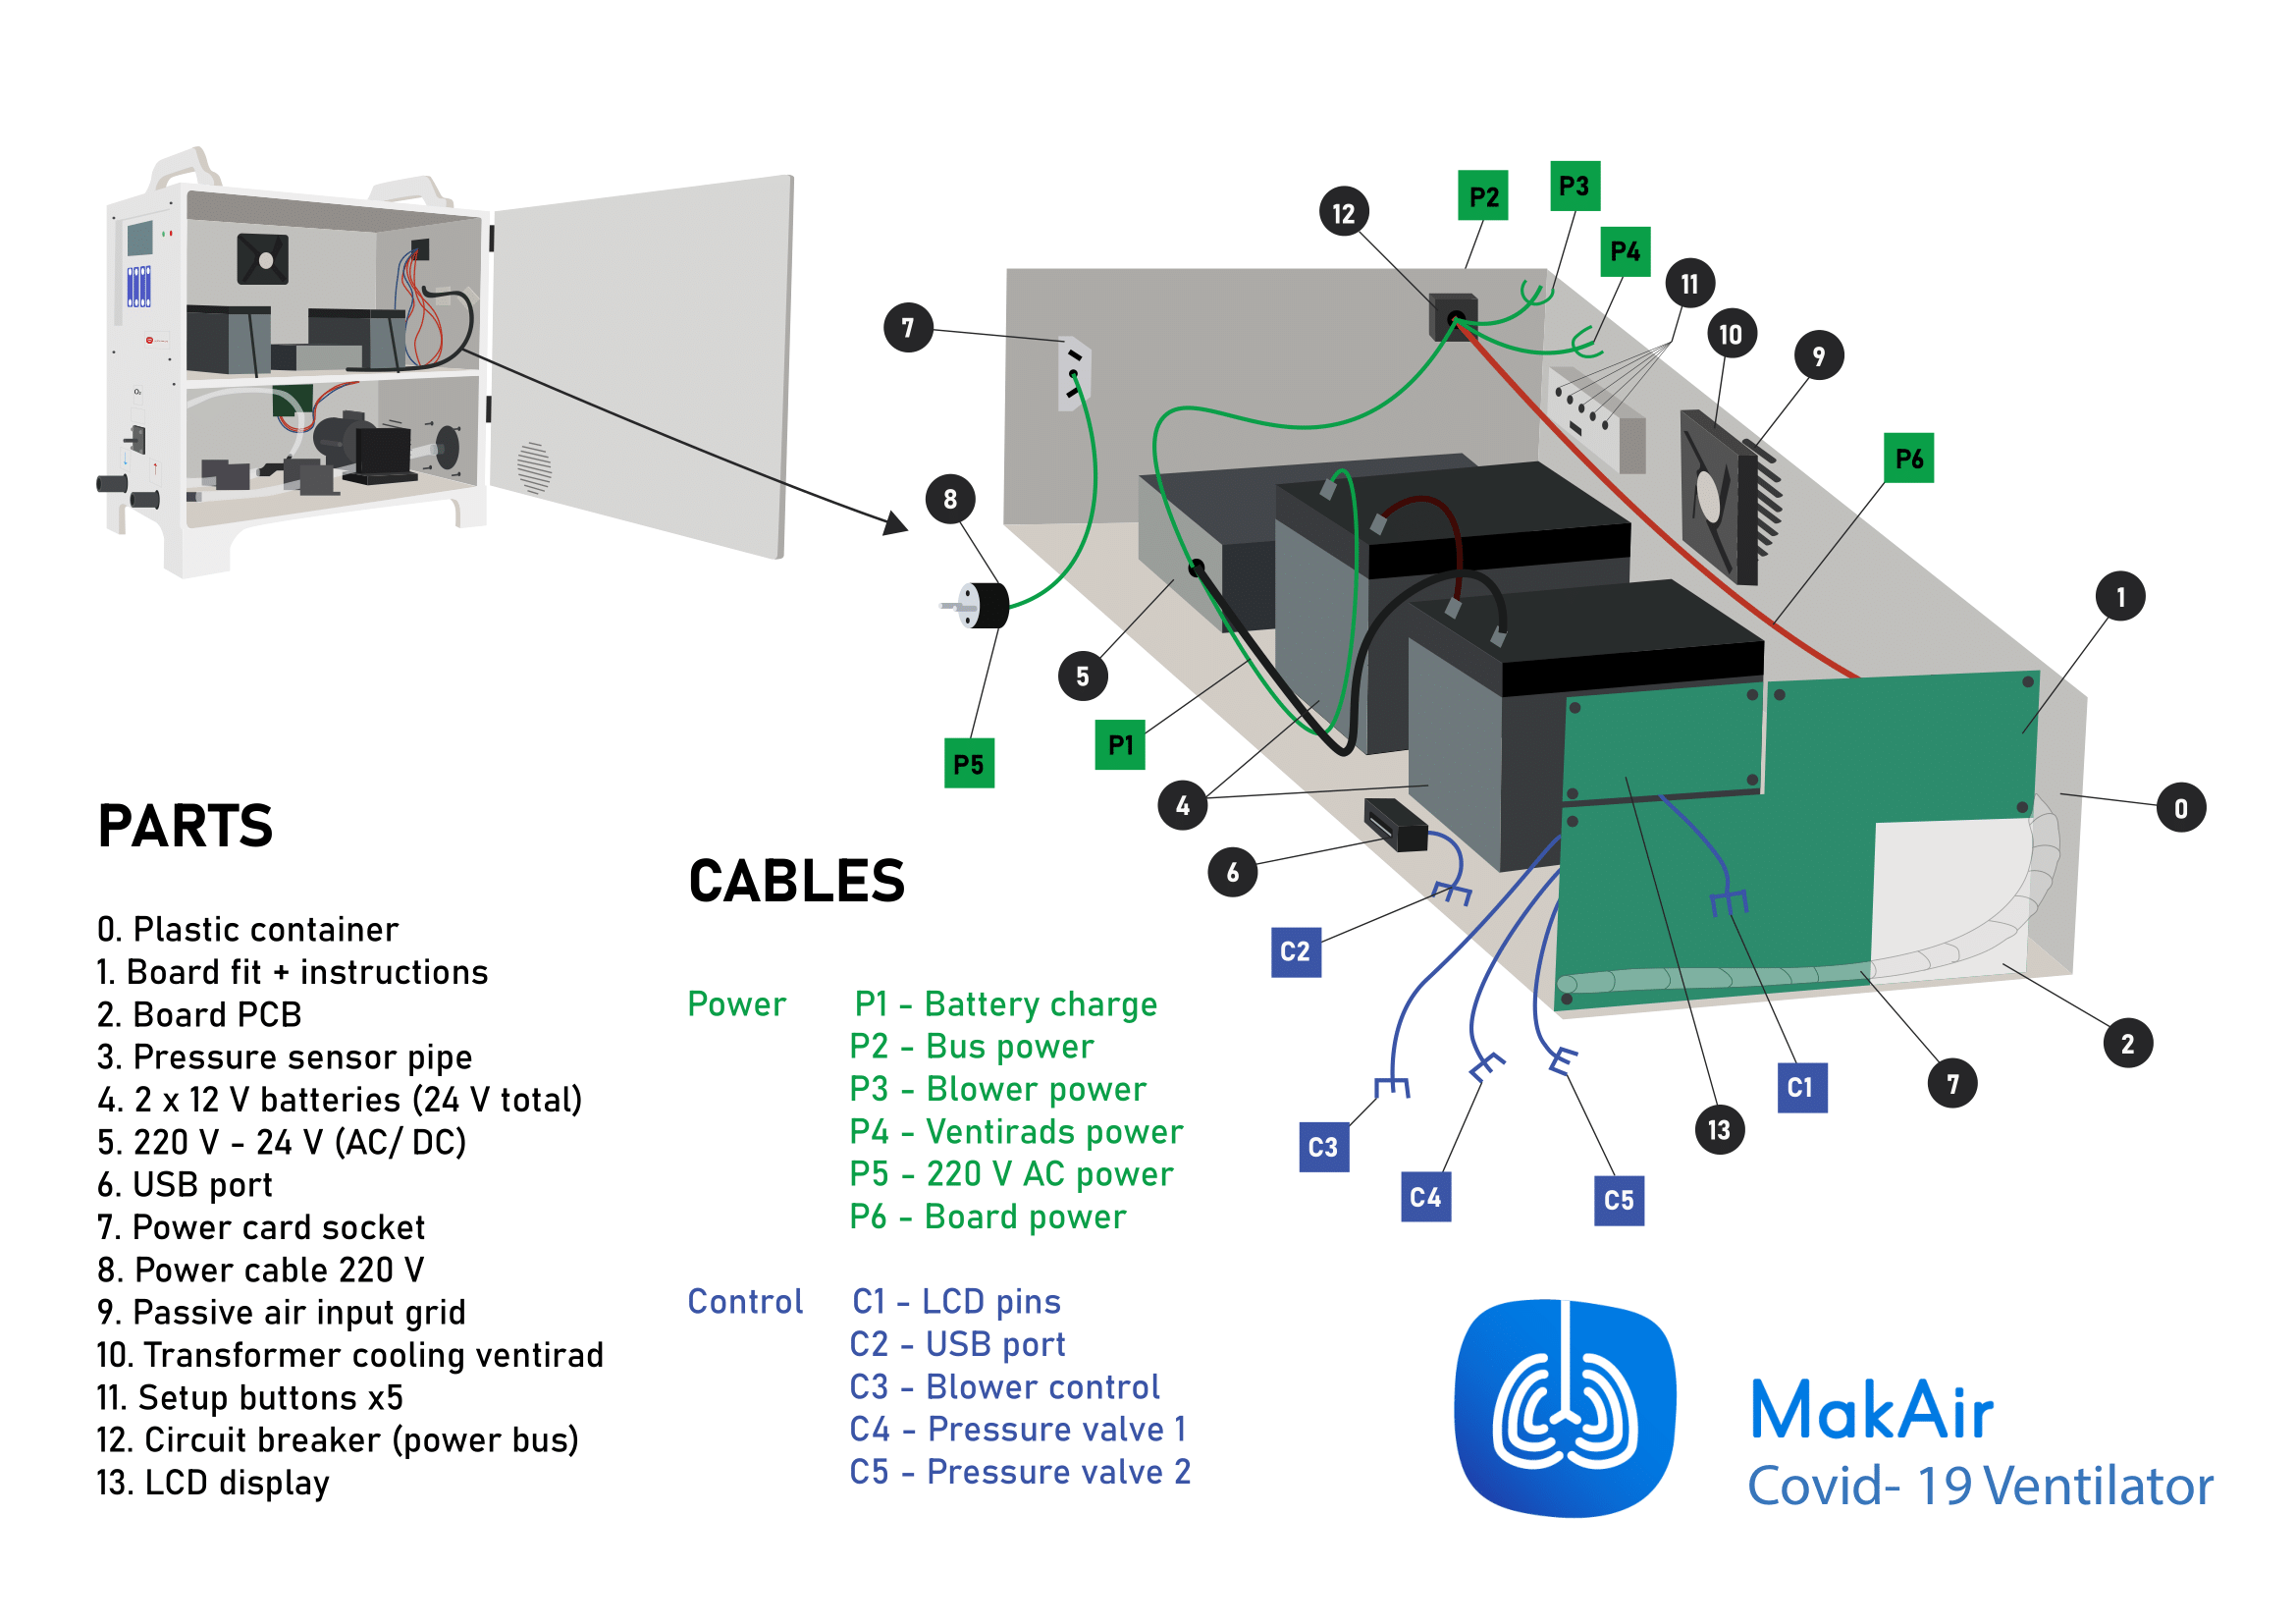
All those components would not work in tandem if not controlled by a central brain, that is software (eg. MakAir firmware). Software needs to be ran on a CPU on a motherboard (eg. MakAir motherboard), to which all sensors and actuators are connected.
As well, some components can be quite power hungry, like the blower turbine. Stable power must be provided at any time by a power unit, composed of an AC-DC transformer, and backup power with batteries. Given the cyclic nature of some components, there might be power surges into the system, which the power components need to handle properly.
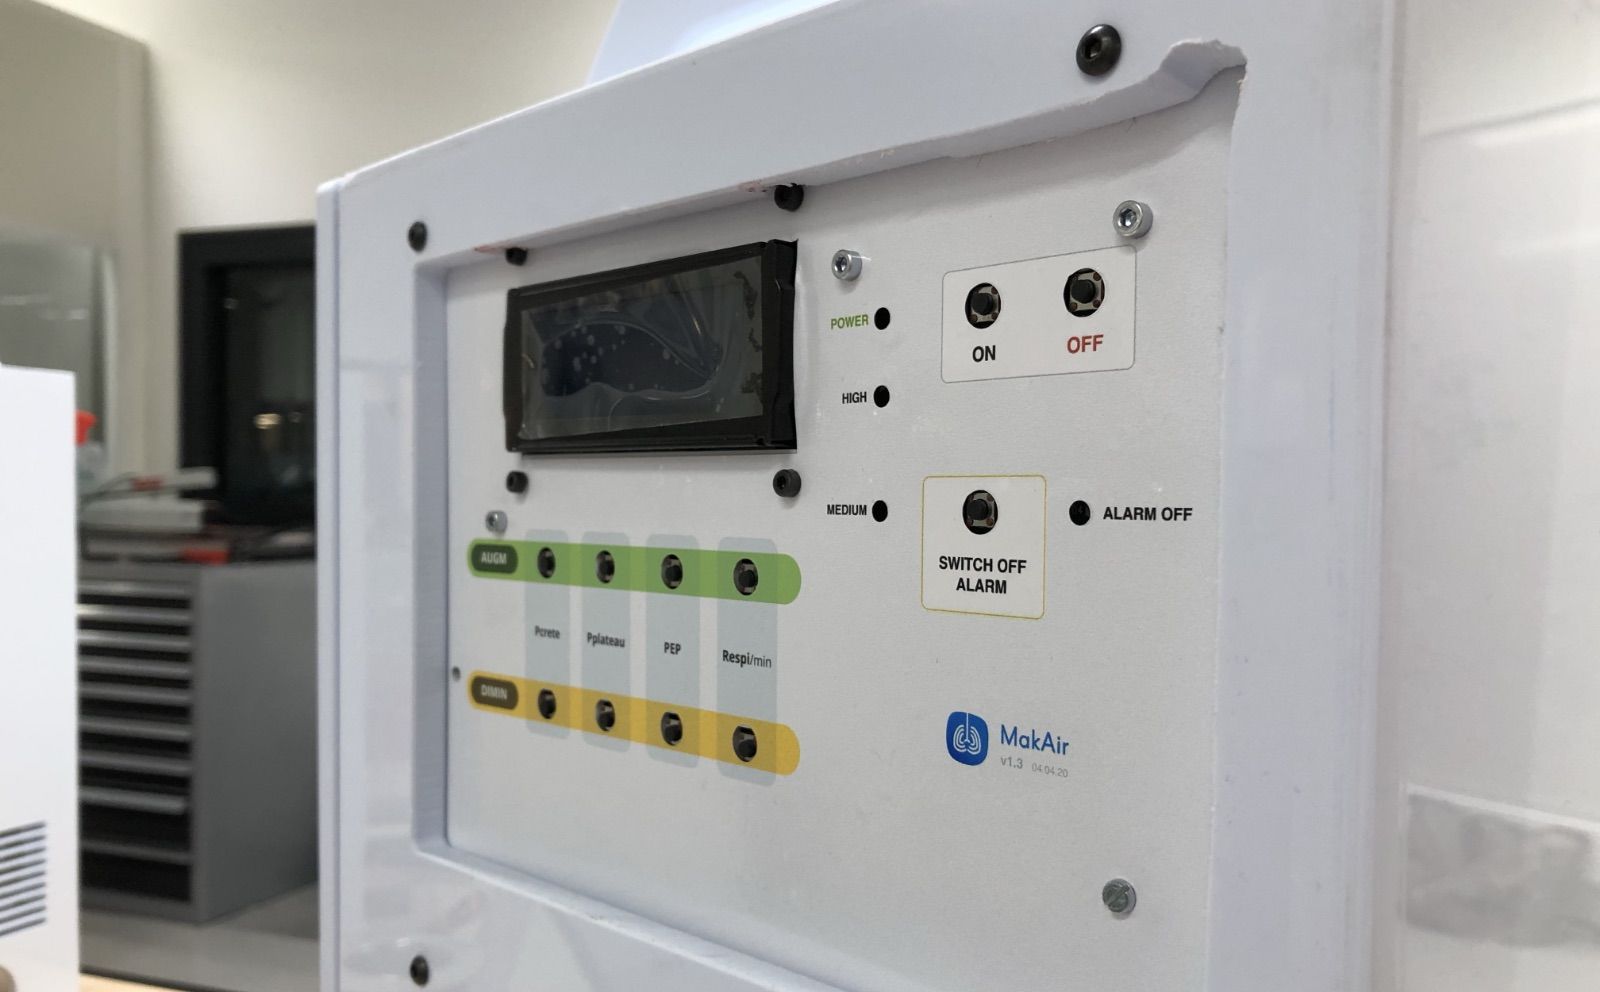
In order to get feedback on the current state of the ventilation of a patient, a user interface should be exposed to the end-user, which live information on important measured values, as well as easy-access buttons to adjust settings, as the ventilator is running.
That is about as simple as the basic functions of a ventilator are! We will dive into the details next.
Internal Components
Given the constraints listed above, we could easily make a list of components that would need to be fitted together to do the job.
Following the air circuit, we would have in order:
- A blower turbine to inject pressurized air into the system;
- A pinch valve system, able to apply more or less mechanical pressure on a flexible pipe, effectively increasing or decreasing the pipe diameter and thus adjusting the air flow, at constant blower speed (a valve per branch, thus one for inspiratory and one for expiratory);
- A range of air pressure and air flow sensors, providing instant measurements to the software layer;
- A main motherboard PCB, housing a SoC (System on a Chip), running ventilation software. All sensors and actuators (blower, valves) are to be connected to the motherboard;
- An AC-DC transformer and a battery pack, providing a stable DC power supply to all electronics;
Note that the component list above is not exhaustive. Some more useful components might be added in between two required components to fulfill a smaller task, eg. mix pressurized air with pure oxygen.
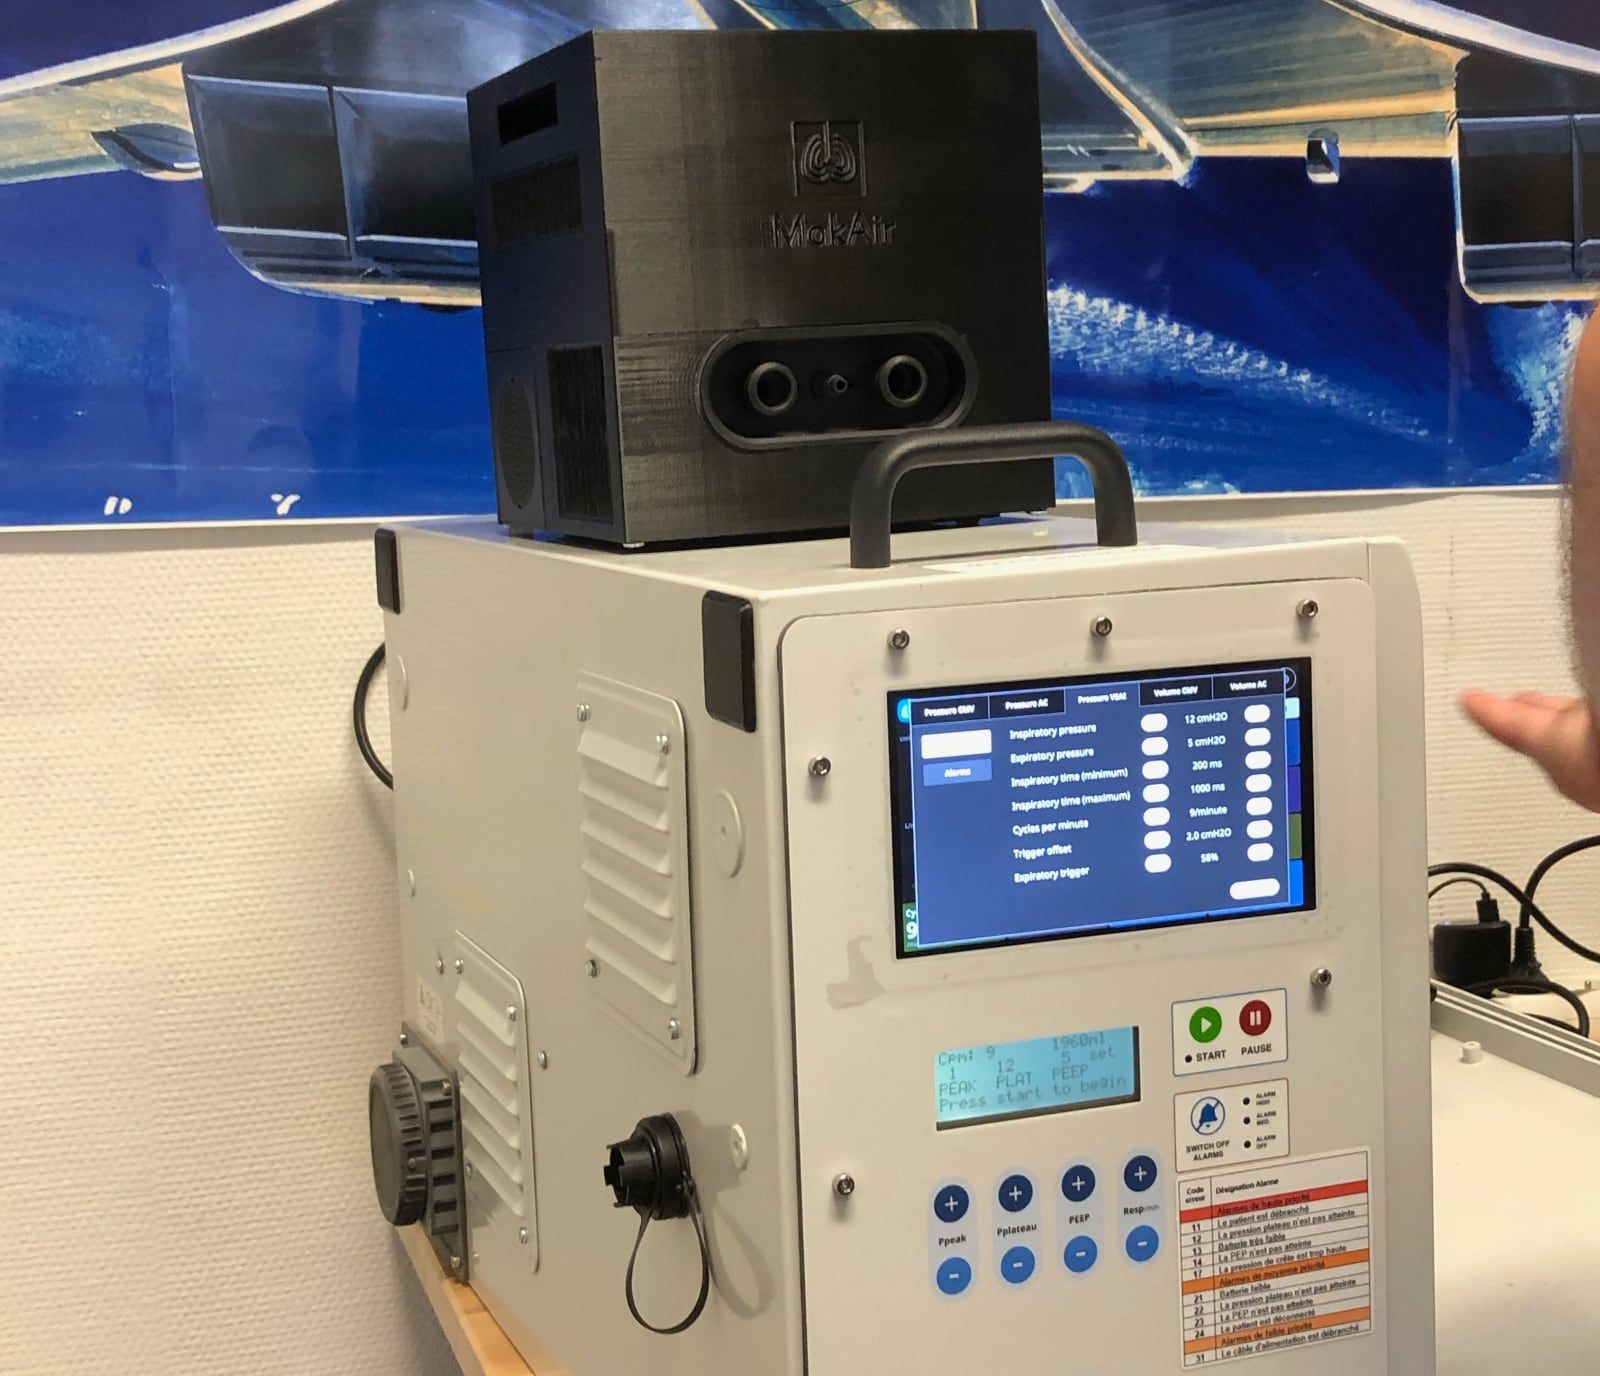
As well, in recent versions of the MakAir ventilator, we have added a 7” touchscreen interface, which is not 100% required for the ventilator to perform its functions, though it lets the user configure more advanced settings as well as select another ventilation mode.
Casing Design
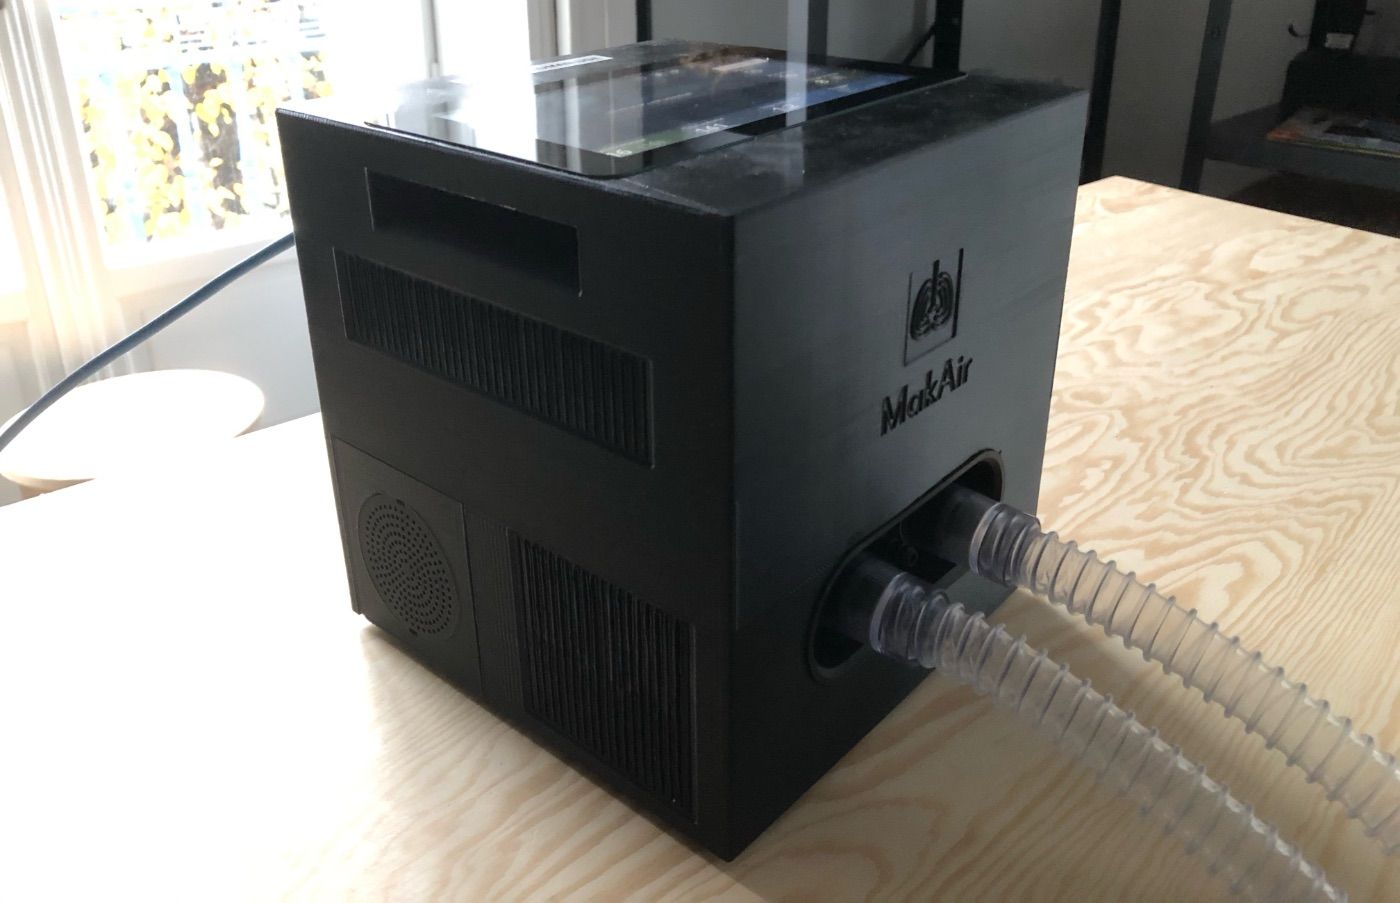
The ventilator casing holds all components together, firmly and solidly. As the casing is the only part of the machine that end users (ie. doctors) see, it must inspire robustness (ie. confidence).
Casing sturdiness-to-weight sweet spot
The MakAir being an emergency ventilator at first, there is a high chance that some of them will be shipped in remote areas using eg. military transportation, in large quantities. This use-case means that the ventilator casing must handle shocks in multiples of g (the acceleration of gravity), at worst.
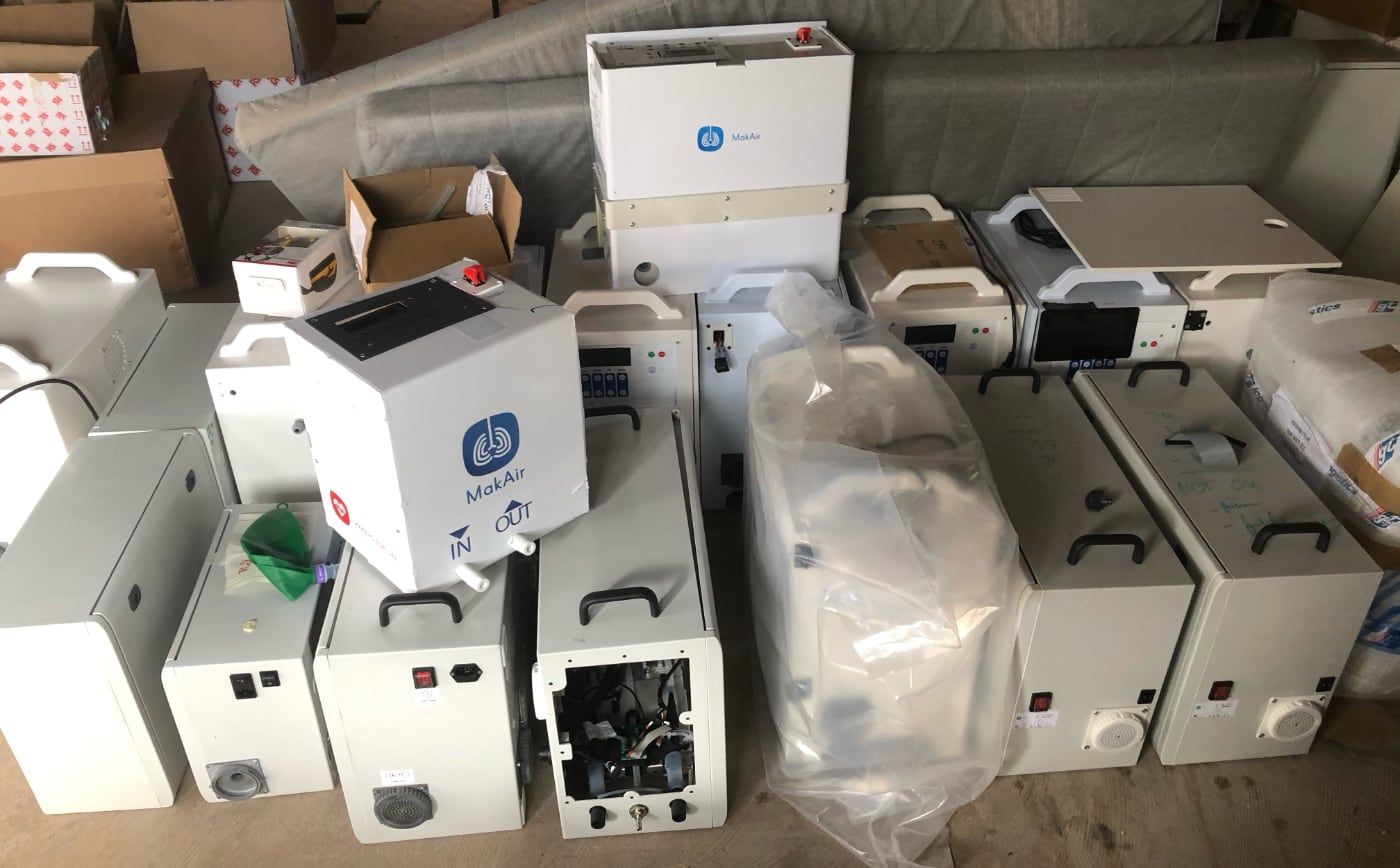
In real-world use on a patient, the ventilator may sometimes lay on a slippery surface for weeks. Hence, the ventilator casing should have a rubber feet system providing adherence to any kind of surface. Rubber feet added to a some weight both make the ventilator slip-safe. For instance, MakAir Standard models (the large ones) weigh 22 kg, while MakAir Mini weighs around 3 kg (the difference being due to the casing plastic density and lead-acid batteries in the standard models). Having some weight is desirable, though the ventilator should be as light as possible for obvious practical reasons. It is important to point out that raw casing weight contributes a lot to the final product weight.
Casing insulation to fluids
The ventilator needs to have some level of insulation against fluids, eg. water or solvants like IPA, used to disinfect its surfaces before and after use. It is a common practice in hospitals to disinfect medical device exteriors using liquids.
As the front side would usually be washed with more attention than other parts due to the front panel being often touched by doctors, insulation is especially important there. This is unfortunately the side in which liquids could enter more easily due to the amount of assembled parts and may cause damage to nearby electronics.
Casing internationalization
To ease with internationalization, printed text on the casing should be limited to a minimum, eg. only to the rear where labels are shown on the AC, Ethernet and USB ports. The rest of localized texts should be handled in a pure-software way, on the touch screen. We found out that it was quite tedious to manage, for instance, front button label prints for each country. Thus, we decided to handle all controls in a pure-software way. This makes ventilator manufacturing quite convenient, as one ventilator design is able to target all countries at once. Shipping it to say, Mexico, means simply changing the default language flag in the firmware’s memory chip from English to Spanish (instead of the whole front panel surface).
Casing manufacturing & cost
In order to mass-produce a product, its components should be manufactured with a high velocity. Considering the ventilator casing, each casing should take a few seconds to a minute to produce. That way, costs are kept to a minimum while manufacturing output is high.
Plastic molds should be built as soon as possible during the project, whenever the ventilator is ready for manufacturing. A mold has, unfortunately, a large upfront one-time cost (around 15,000 EUR, in our case), but can be made profitable quickly on large production volumes, as it lowers the cost to produce each unit (a MakAir Mini casing raw cost is estimated to be 5 EUR using plastic injection).
This compares to the MakAir Standard casings, which are based on extruded electrical boxes that cost 300 EUR each — plus labor cost to get it ready for final assembly. That could easily add up to a total cost of 400 EUR.
Considerations for prototyping
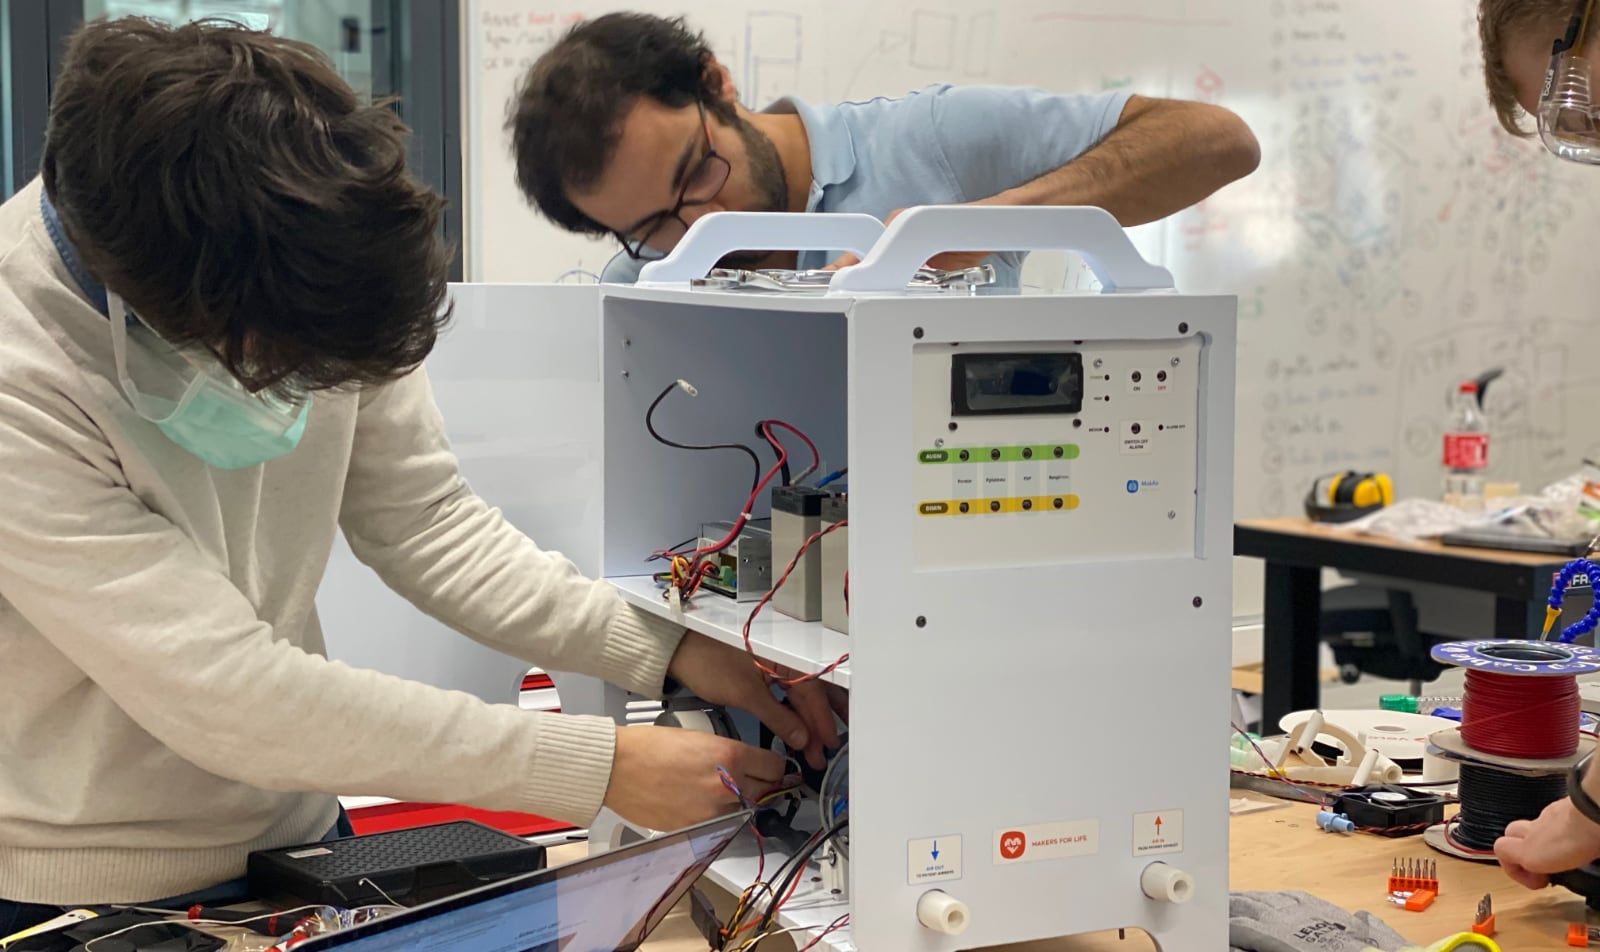
While developing the original iPhone, Apple engineers were working on a large development board, which was much easier to iterate on using bare hands. Miniaturization came afterwards, when manufacturing the final product. We did exactly the same thing with the MakAir.
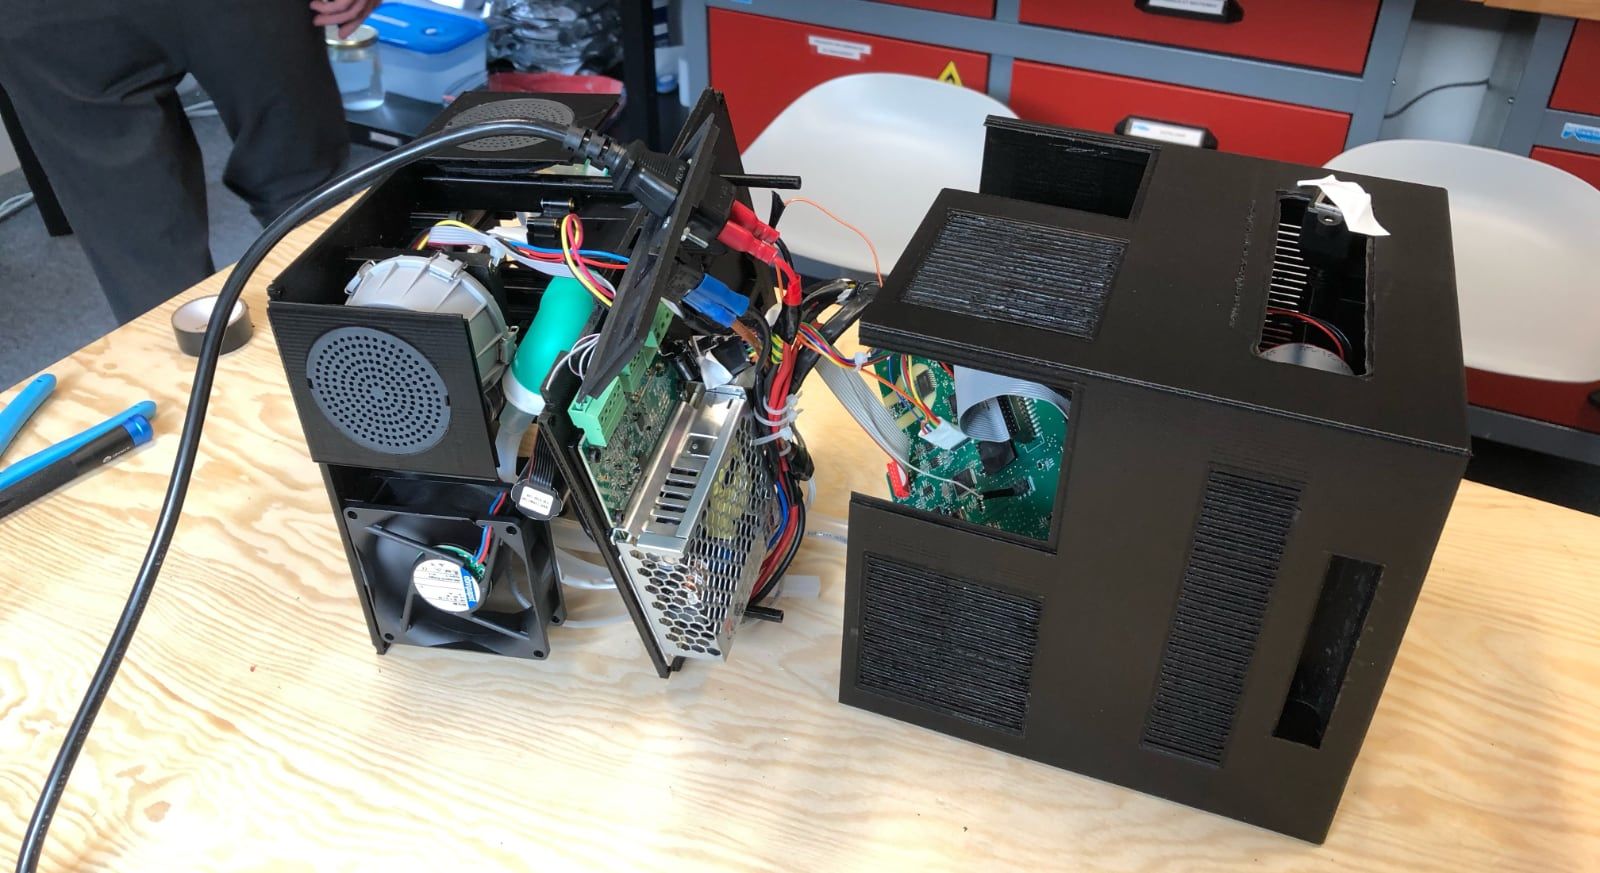
It is always a good idea to prototype on a scaled-up version of your product, letting engineers swap components and try new things with their bare hands. Our original MakAir Model 1 and Model 2 were designed to ease prototyping and maintenance. We then built a much smaller MakAir Mini using the same components.
Regulatory & Safety Requirements
As all electronics on the market, any MakAir device produced must comply with certain safety standards.
As well, due to the MakAir being a medical device used on humans, it must implement several important regulatory points, and then get certified by each target country regulatory authority (eg. FDA for the US).
I have compiled a non-exhaustive list of the most important regulatory and safety requirements that must be considered when designing and manufacturing a mechanical ventilator such as the MakAir.
Regulatory requirements
Those points are absolutely necessary in order for the ventilator to pass medical certification:
- Electronics within the ventilator emit Electromagnetic Radiations, that must be kept within limits as it may interfere with nearby medical equipments in the hospital. This is especially true for the AC-DC transformer, which is the most likely emitter;
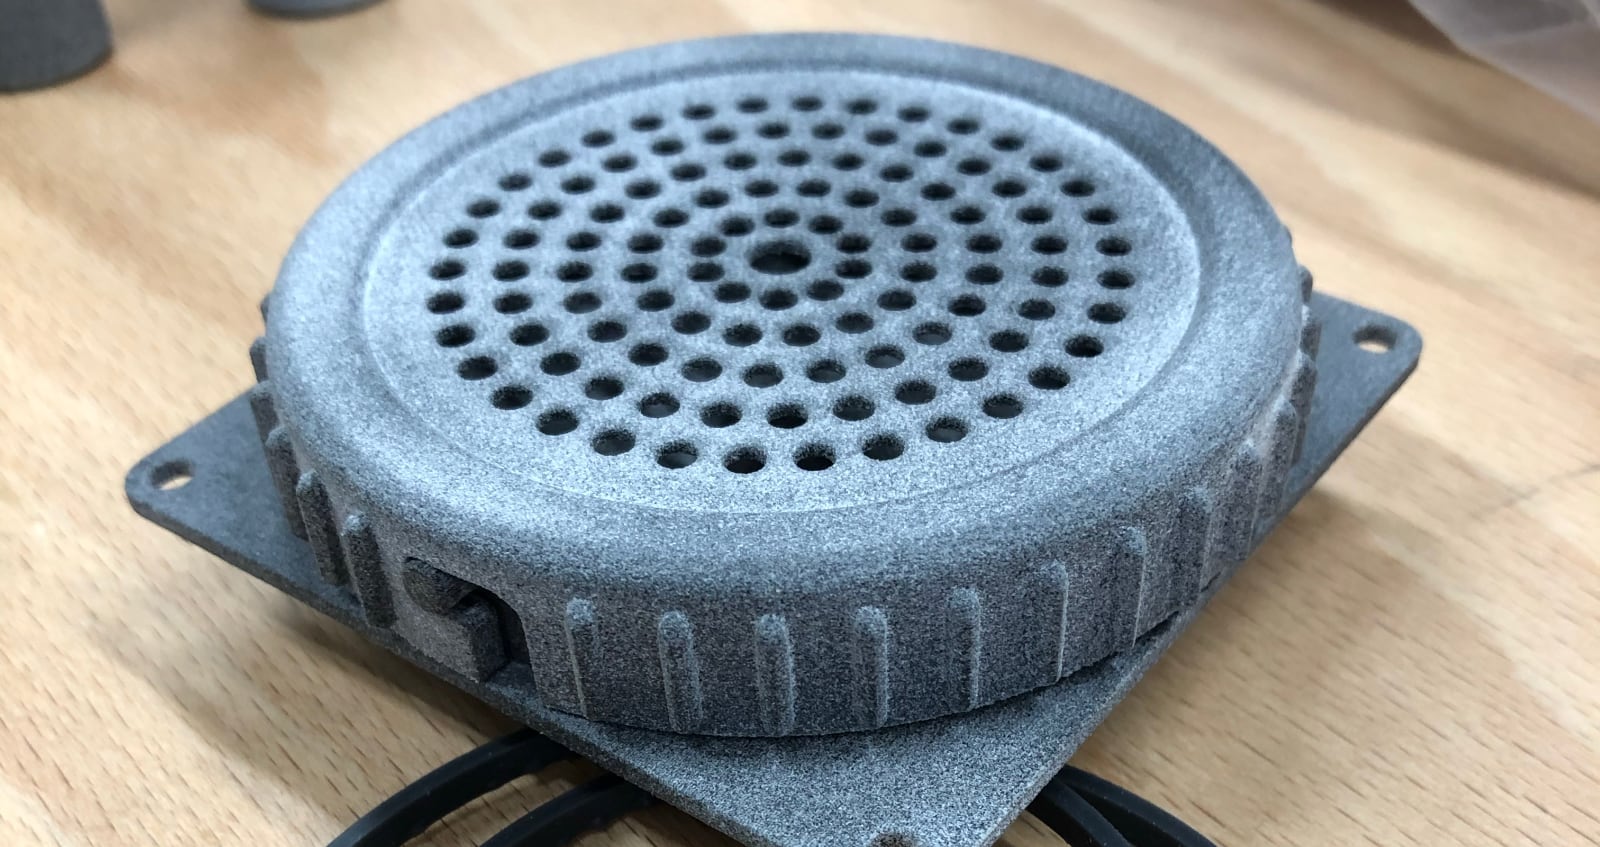
- The ventilator must emit audible and visible alarms when doctors are to be notified of an anomaly during patient ventilation. Sounds must be emitted at a specific pitch and level from a buzzer, which must be sufficiently loud to be heard from other rooms in an hospital. Alarm codes, severity and associated buzzer pitches are normalized;
- Whenever the patient needs to be moved rooms, or the hospital loses AC power, the ventilator must move to backup power on batteries. It must guarantee an autonomy of 30 minutes minimum, though the MakAir has been tested to last up to 4 hours on batteries;
- All materials that come into contact with air that get into the patient lungs (mostly plastics), must be proven to be biocompatible through a laboratory test. They must not release harmful chemicals over time. If they do so, it must be within safety limits;
- Input and output air should always be filtered using (at least) HEPA-14 filters, which blocks most particles with a diameter of 0.1 microns (the COVID-19 virus is 0.125 microns). This means that the patient doesn’t get cross-contaminated by germs from the hospital room air, and that virus particles don’t get blown out of the ventilator;
- As the ventilator might be shipped in cargo airplanes in large quantities, the battery that’s inside should conform to airline FAA regulations. Lithium batteries can be problematic (given their power density), which is why lead-acid batteries might be preferred, though bulkier and heavier. Batteries could as well be swapped out, and installed upon delivery of the machine;
- Before and after the ventilator is used, medical personnel must be able to disinfect the air circuit and casing with eg. an Isopropyl alcohol solution;
Safety standards & ease of use
Those safety & usability points are must-have in a mechanical ventilator if is to be accepted by hospitals and doctors:
- The expiratory branch should be easily cleanable and replaceable, unless a brand new ventilator is to be used for each patient. As this branch uses negative pressure relative to the lungs, patient air always goes out from there. The inspiratory branch is not affected, as it uses positive pressure. The pipes and the air flow sensor should be entirely replaceable on the expiratory branch, after each use.
- The ventilator must sometimes be used up to 2 weeks on the same patient, continuously. It has to be able to sustain this (mechanically), and allow for medical personnel to intervene and wash pipes whenever the patient cough and clogs the tubes (ie. the one that connect the ventilator to the patient, brought by the hospital);
- For usage safety reasons, the ventilator plastic casing must not exhibit sharp edges. All edges and corners should be rounded, which also facilitates disinfection of the ventilator exterior;
- As pure oxygen (100% O2) might be injected and circulated in the ventilator pneumatic circuit, any spark could start a fire. Consideration must be taken to make things safe under pure oxygen;
- The casing should be molded using a high-quality color-neutral ABS plastic. Color pigments might release chemicals, hence why most medical devices have that specific white-yellowish color as their ABS plastic does not contain any color pigment;
- In terms of usability, anything shown on the control screen, especially fonts, must be visible from a certain distance (meaning: from the far side of the bed). Not all people have a perfect vision, especially when working late during the night where eyes become tired and things get blurry;
- The control screen should lay at a specific orientation, from 90 degrees (ie. vertical), to 45 degrees. Medical personnel should not have to bend over the ventilator to use the screen (as we did in the MakAir Mini prototype, on which we plan to let the screen be deployed at a custom angle using an articulated joint — you can see it in 3D there);
- As the ventilator targets an international “audience”, its interface and documentation should be available in multiple languages. That is to avoid human error due to misunderstandings. Language could be pre-configured during manufacturing, and adjusted later through the ventilator interface. It is important that it persists across machine reboots;
- Pressure sensors measure the air pressure relative to ambiant air. As the ambiant air pressure may vary in certain situations, the ventilator should auto-calibrate its air pressure offset regularly, when the ventilator is not in use (eg. when the machine is manufactured, and later every time it boots up);
- The ventilation control software (ie. the firmware) must be proven to be 100% reliable, as it has the full responsibility of maintaining the patient alive in the case of invasive ventilation. 4 minutes without oxygen induces permanent brain damage, this point must not be treated lightly. As well, in case of a mechanical failure of a sensor or actuator, the firmware must detect it and start buzzing alarms so that medical personnel can move the patient to a second ventilator;
Closing Notes
This article was the third of a series on the MakAir story, providing insider details on the project, medical knowledge on the state of the art of mechanical ventilation, as well as in-depth engineering explanations on how we designed our ventilator algorithms and electronics. The overall goal of this series of articles is to build the legacy of the MakAir project.
As commercial ventilator designs are patented and thus not freely available on the Internet, getting together the building blocks of a ventilator could take someone weeks or months. This is literally what the MakAir team went through, by iterating on designs until we stuck to the right one. Being given a bird's-eye view of existing ventilators would have helped us save tremendous time when we began, which is the goal of this article. I hope you will find solace in it.
Also, I’m always available to answer questions, please ask them in the comments section of this article!
🇮🇹 Written from Rome, Italy.