When the Formlabs Form 3 was released back in late 2019, I jumped on to ordering it and trying it out, with a future hardware project in mind. I was new to SLA (Stereolithography), coming from the world of FFF/FDM (Fused Filament Fabrication) with my MakerBot Method. Unfortunately, I did not realise the amount of smell and vapor that such a printing equipment produced in comparison to FDM printers. That's where I figured out that I needed to build myself an enclosure — to ensure I could safely use a SLA printer in my flat.
Before starting venturing on to building an enclosure, I looked for existing 3D printer enclosure products on the market. Unfortunately, all enclosures that I could find were designed to host a single machine that did not fit the Form 3 required opening area (they were all not high enough to give the printer lid enough room to fully open). Adding to that, as my Form 3 came with a Form Wash and a Form Cure, the enclosured would need to be nearly 3 times the width that of a regular printer enclosure to host all 3 Formlabs machines. And, last, given the amount of potentially harmful resin smell coming from the printer itself, as well as highly flammable IPA (Isopropyl Alcohol) fumes coming from the Form Wash — well — I needed the enclosure air to be vented outside and renewed.
That was about time to build my own custom enclosure!
Enclosure Design
Before I start showing the enclosure itself, here were my requirements:
- No heavy metal / wood / plastic work should be involved in building this enclosure. At best, I should buy a piece of furniture on the market and tune it with the right parts to transform it into an air-tight enclosure.
- With practicality in mind, the enclosure would have to host the machines themselves, but also all printing tools, resin tanks and resin cartridges.
- The enclosure should be able to vent spoiled machine area air outside and renew it, without leaking much smell outside (I would need to create a negative pressure area where the machines sit, thus positive pressure in the air extractor duct).
- Given the flammability of Isopropyl Alcohol, the enclosure should let me safely store IPA tanks away from light and heat (and... sparks), with a chemical leaks recovery tank underneath. This also counts for spoiled IPA that should be stored in another tank before going for chemical waste or recycling.
- The enclosure should have some space where I can work on post-processing prints and doing messy stuff, like cleaning resin spills or removing failed prints from resin tanks.
- As machine area air would need to be renewed and vented outside on a permanent basis, I would not like to leave the window open at all times, or dig a hole in the window. The existing window air inlet should be removed and fitted with the air extraction system. Still, the window should be kept openable at any time, without requiring disassembling the air extractor connection. Ie. someone who's not aware of the air extractor, who would open the window, would not permanently damage the air extractor duct.
And now, here is the result based on the above requirements (teaser):
Overview Video
Shopping List
The beauty of this design lies in the very few components required to assemble it. The most expensive and largest parts are made of pieces of IKEA furniture, and custom-cut acrylic panels.
Note that some links shared there may refer to websites selling in France only. Please fallback to your local seller, eg. local IKEA with the same product reference. As those links refer to products that are due to be deprecated at some point in time, those links may not be valid anymore at the time you are reading this article.
Here is the full shopping list (ie. list of required materials), which does not include the tooling (eg. screwdriver et al):
- 2x IKEA BROR large version 110x55cm (used for the printing area; we need to stack two of them in order to create the metal frame that will hold the acrylic panels; the second BROR workbench will only be partly used, you could recycle spare parts eg. its wooden surface to build a separate table);
- 1x IKEA BROR small version 85x55cm (used for the post-processing area);
- Acrylic panels, custom-cut, transparent with a thickness of 4mm, and the following exact sizes and counts: 1x [108.4cm x 74.2cm] + 2x [53.4cm x 74.2cm] + 2x [50.6cm + 74.2cm] (I ordered mine online at the French website "Plexiglass sur mesure", which manufactured my panels and shipped them under 2 days);
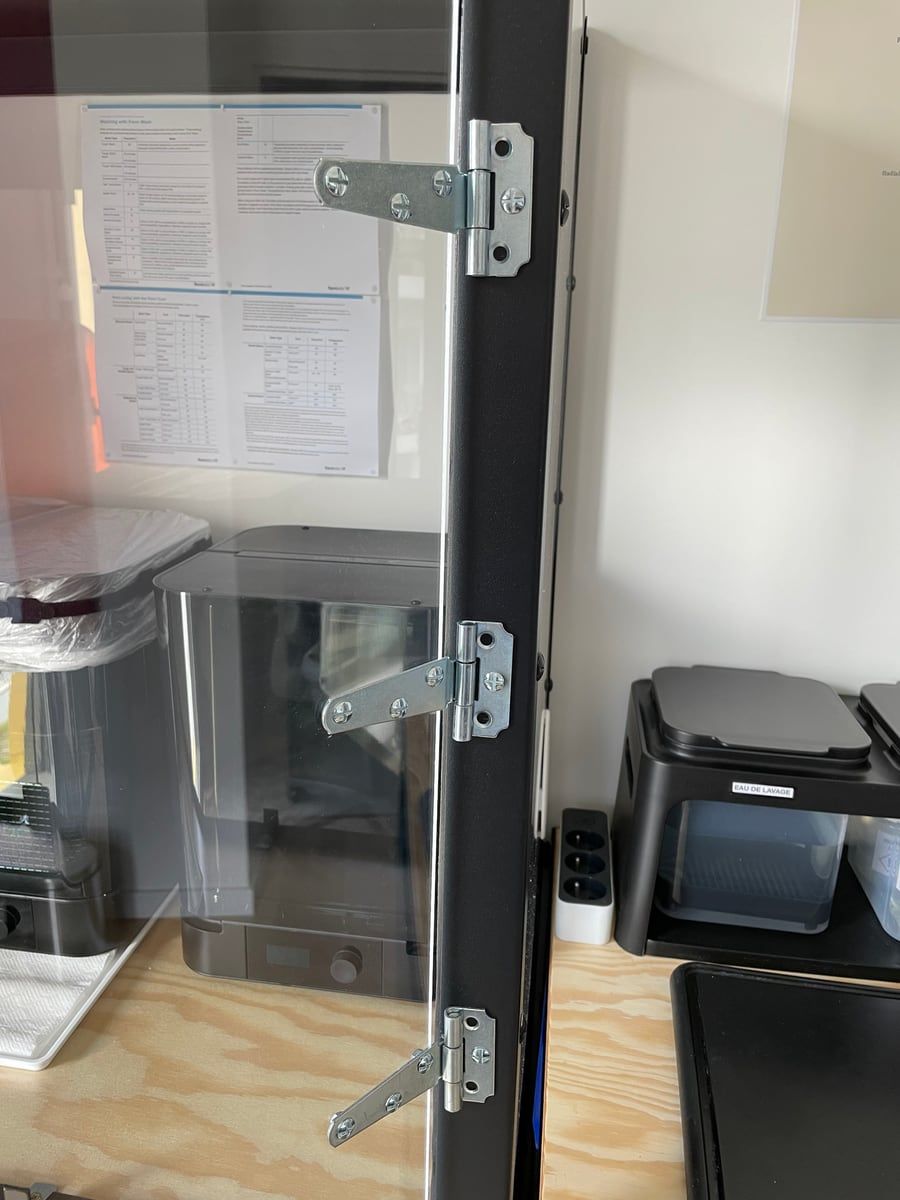
- 6x door hinges (no specific model, please refer to my pictures to find a lookalike version that fits nicely, from your local tool shop);
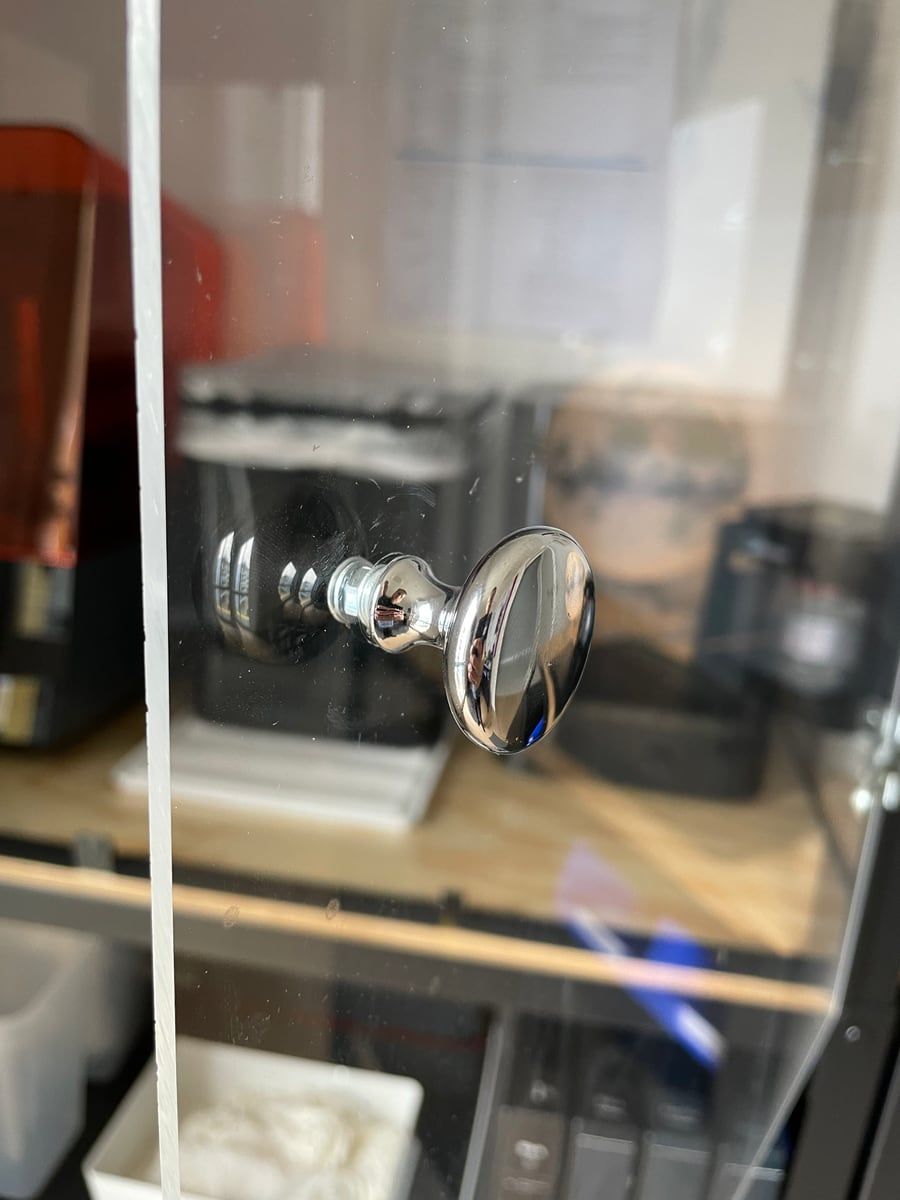
- 2x door knobs (no specific model, please refer to my pictures as well; they need to be screwed with a small screw to the epoxy panel, from the rear of the door);
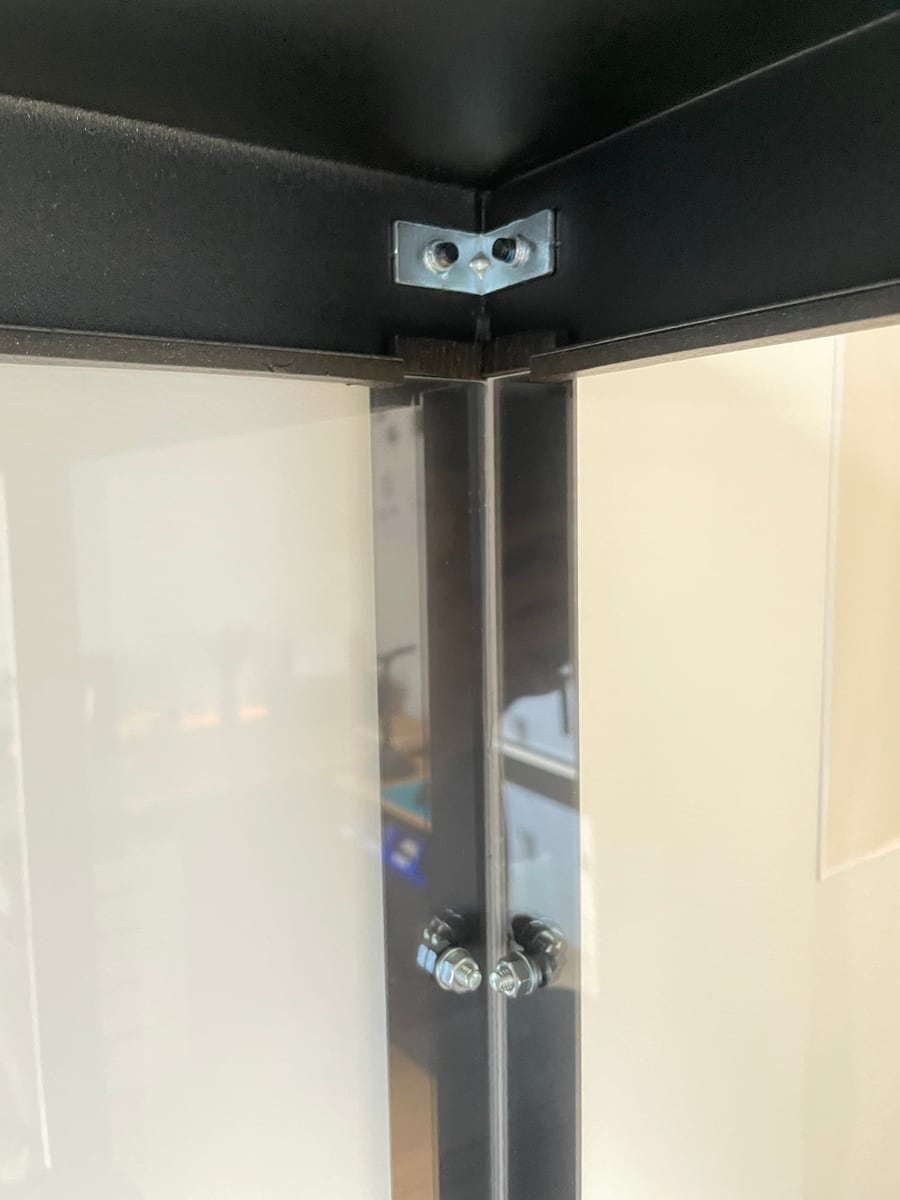
- 1x 10m of adhesive seal tape to seal acrylic panels with the metal frame, as well as acrylic doors with their frame (the rubber band should be approximately 6mm high, 1cm thick, and be very smooth on pressure — preferably black-colored);
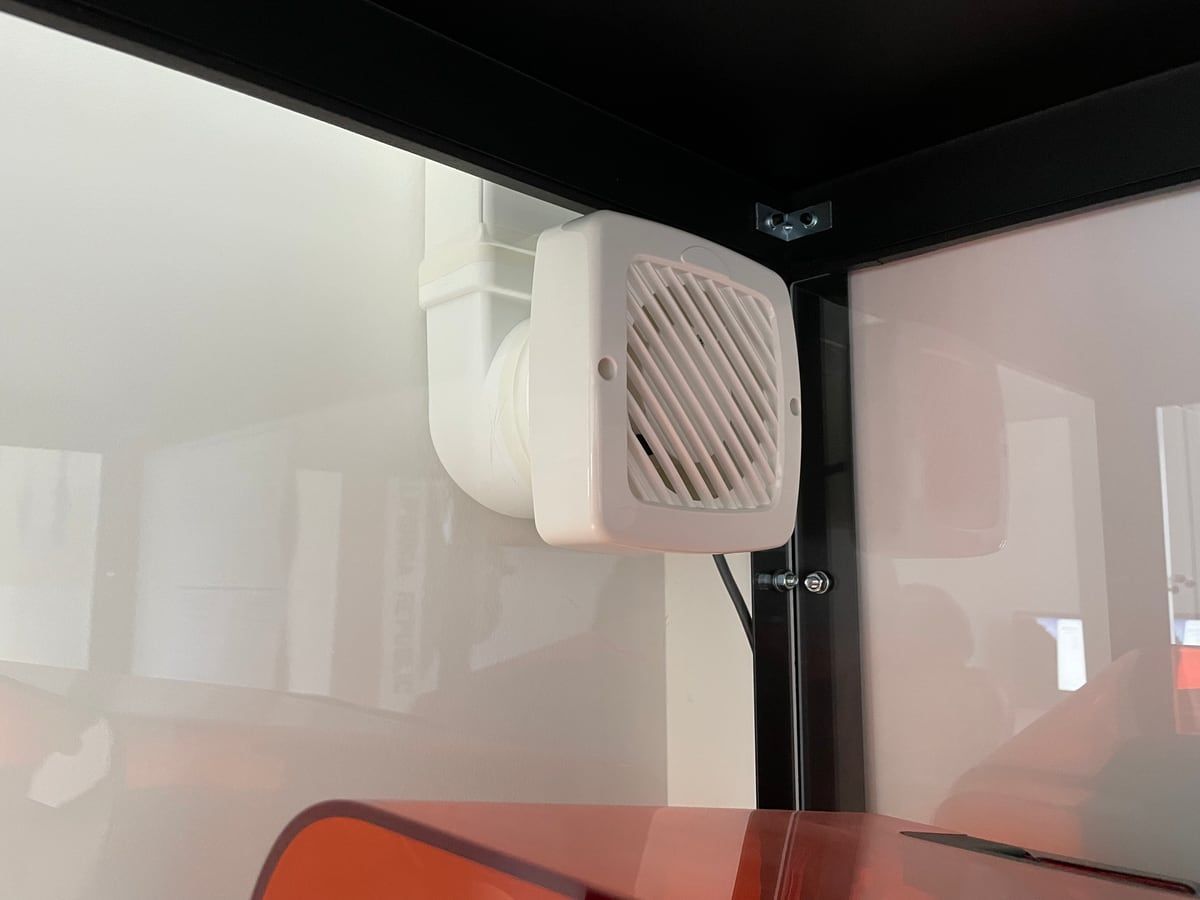
- 1x air extractor fan, with a 10cm diameter duct outlet;
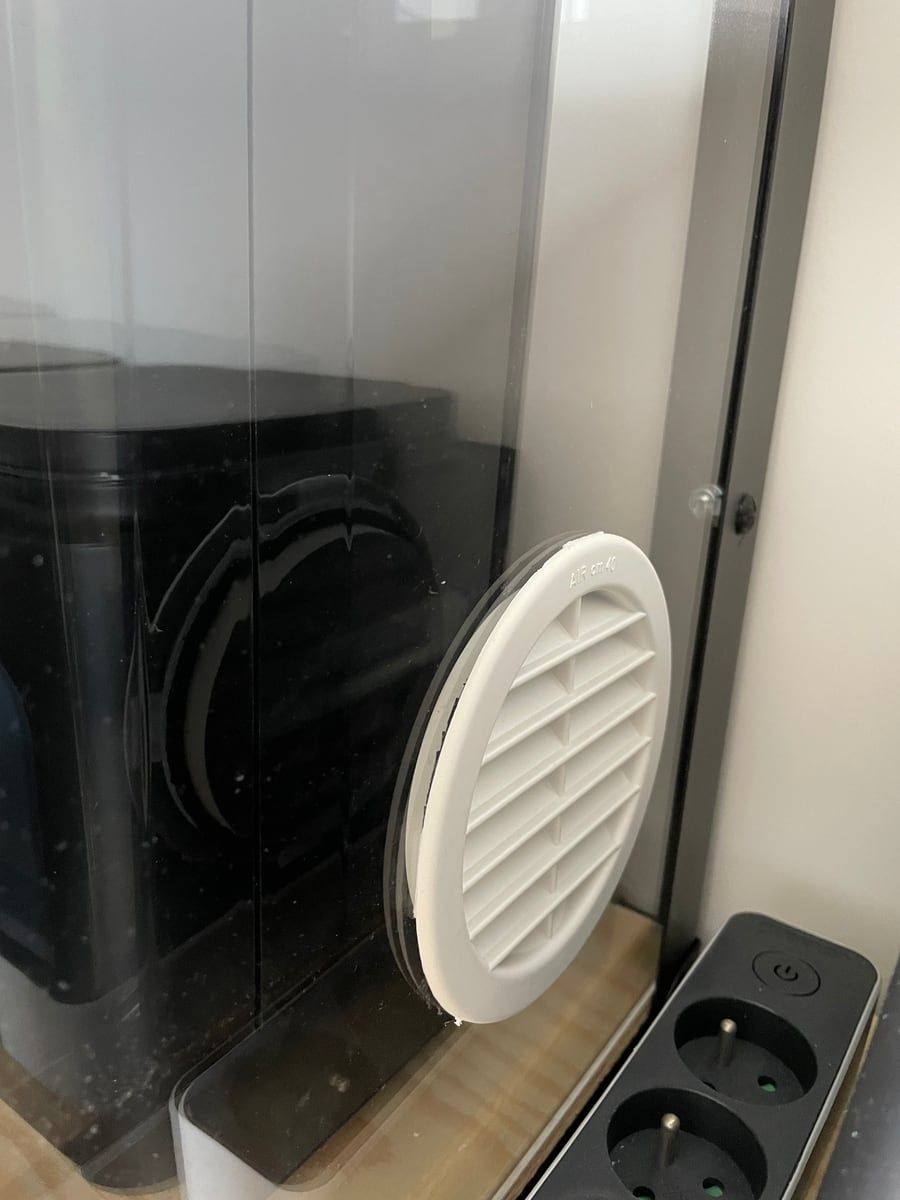
- 1x passive air inlet grid, with at least 10cm of diameter (this helps exchange air between the room air, the vented area, and the outside air, via the negative pressure created by the air extractor fan);
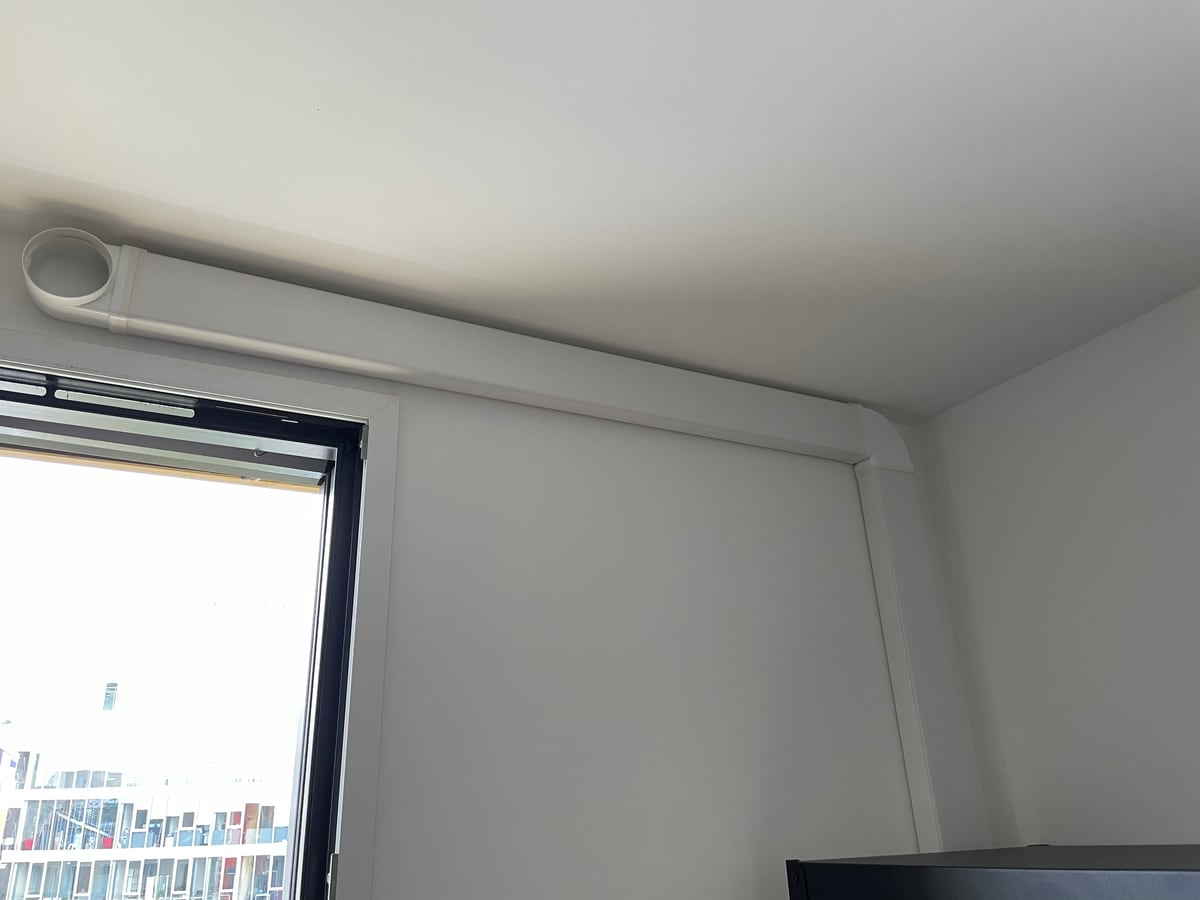
- Air duct parts, flat rectangle variant, made of: 2x 10cm diameter inlet/outlet connectors + 1x angle connector + 2x long rectangle duct "pipes" (you can find a look-alike version in your local shops, you may refer to my links there, and pictures below, to find a similar product, mine are from the brand "Atlantic");
- M5 screw set with their bolts and a large set of screw spacers;
You may also need to buy some specific tools in order to proceed some operations:
- 1x Diamond-coated drill bit, with a 10cm diameter (this is mounted on your drill, and helps cut a circular hole for the air extractor fan and air inlet grid, just make sure to drill at a low speed to avoid cracking the acrylic panel);
That above, was solely to build the piece of furniture itself. Which would not be handy without its own set of accessories:
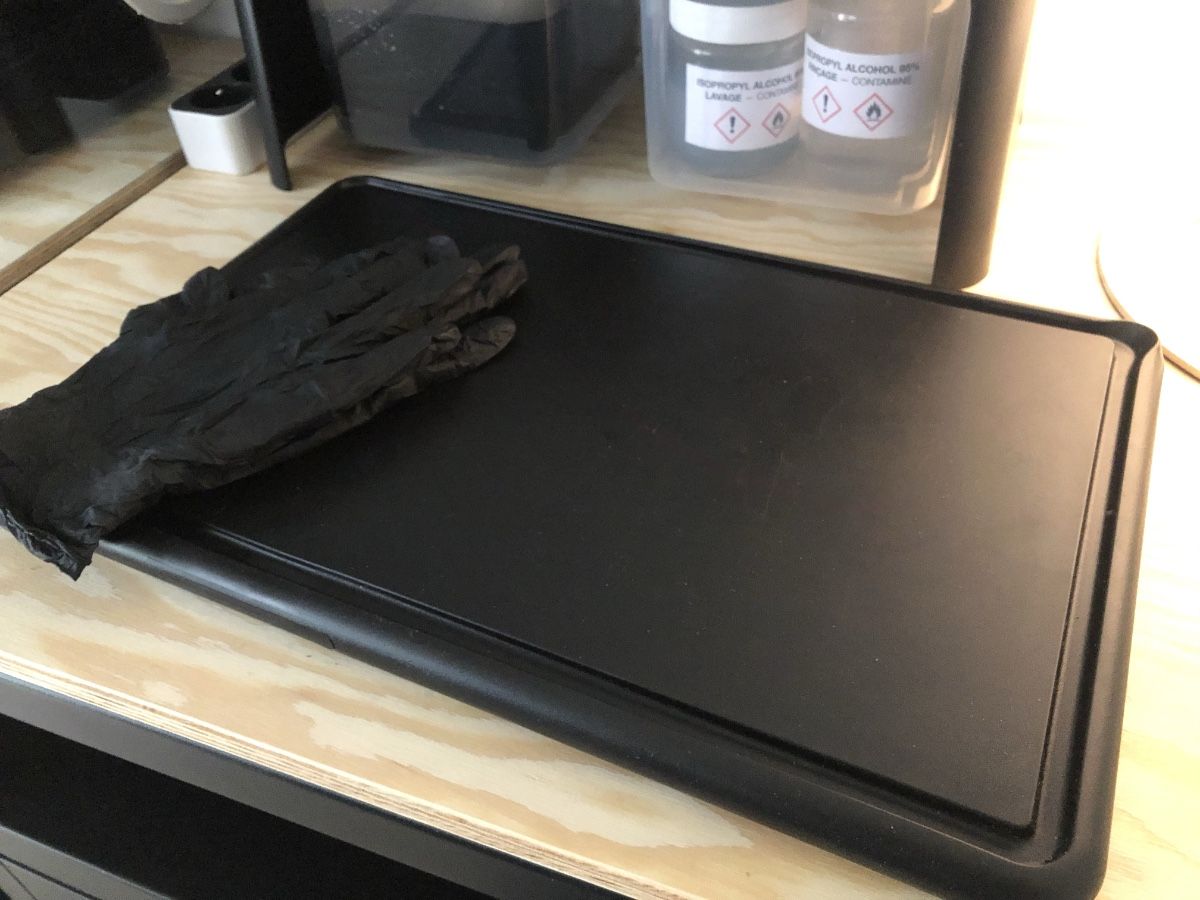
- 1x IKEA SYSSELSÄTTA (plastic kitchen cut plate, used to protect the wood frame from resin and IPA spills while post-processing your prints);
- 2x IKEA 365+ high rectangle boxes (used to store accessories and polymerized resin trash);
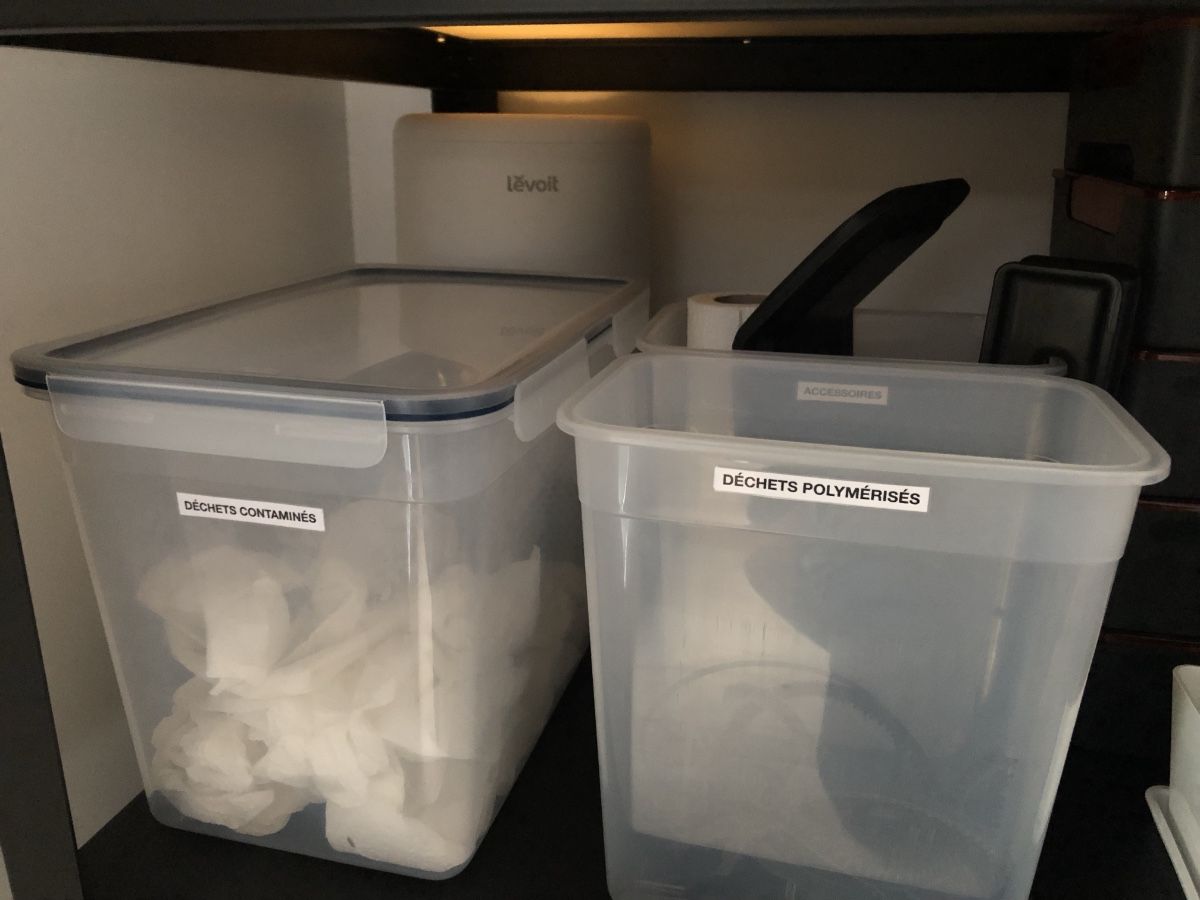
- 2x IKEA 365+ large rectangle boxes with its IKEA 365+ sealed top lid (used to hermetically store smelly and messy trashes, eg. non-polymerized resin and IPA-spilled towels)
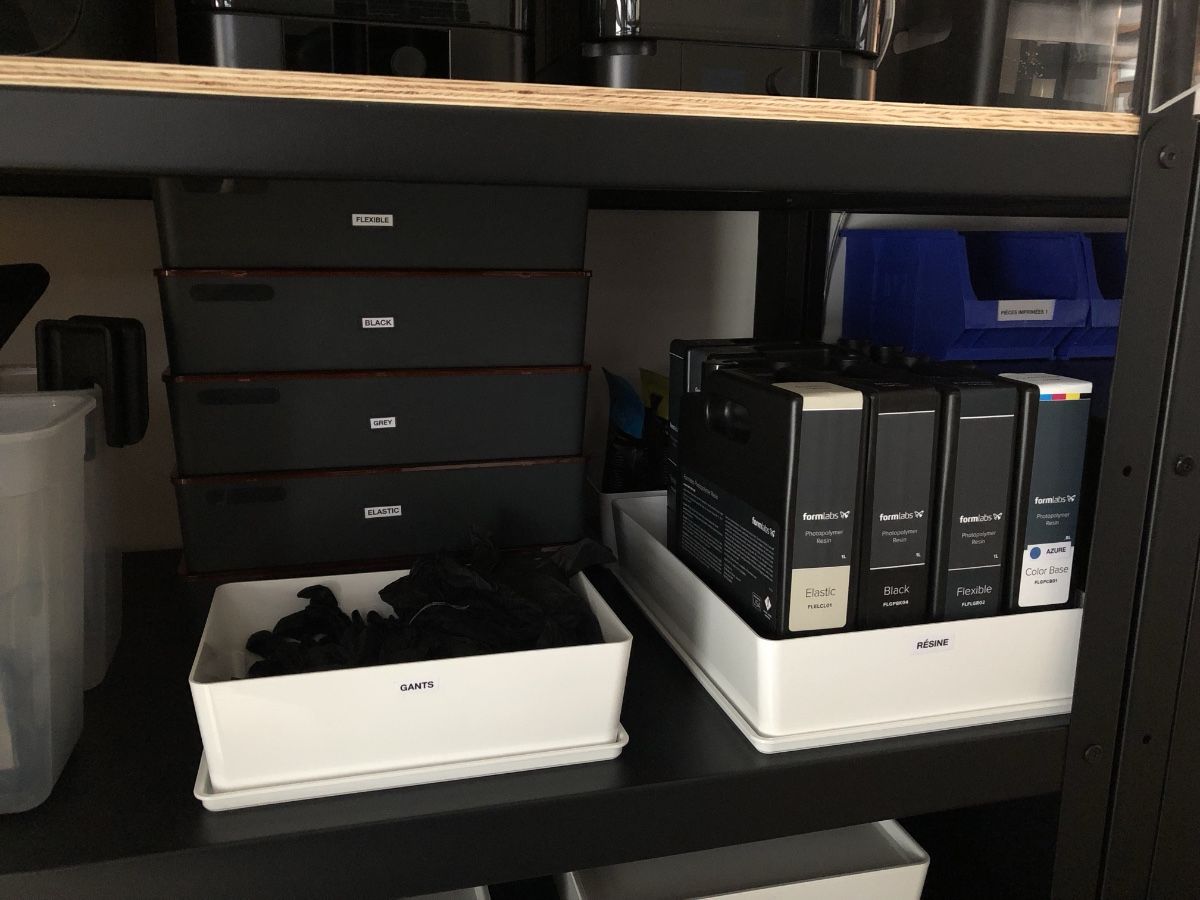
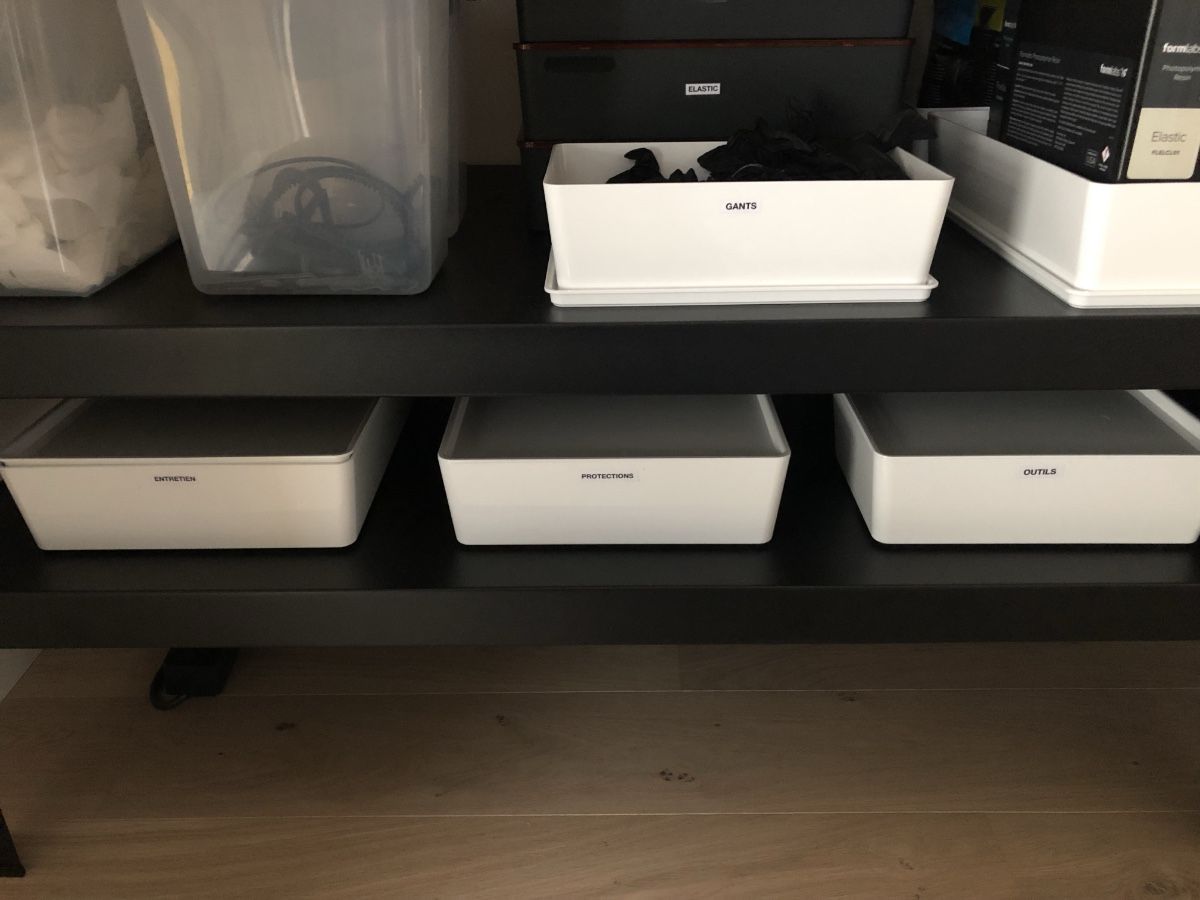
- 2x IKEA KUGGIS small version (used to store post-processing hand tools + nitrile gloves);
- 3x IKEA KUGGIS large version (used to store all maintenance tools, safety equipment and resin cartridges);
- 1x IKEA KOLON (used to protect the enclosure wood panel from IPA spills or resin spills, you will need to cut it in order to match the wood panel size);
- 1x large generic tool storage box (used to store fresh IPA tanks and contain any leak, mine is red on the picture, and can contain liquids);
- A set of 2.5L HDPE jerrycans to dilute and store your fresh IPA (I personnally dilute my 99.9% IPA down to 95% with water, and store it in small quantities in those 2.5L jerrycans — for safety reasons);
- 1x Levoit Vista 200 air purifier (stored resin tanks and cartridge can be a little bit smelly, running this air purifier constantly at its lowest fan speed helps eliminate smells, thanks to its activated carbon filter and HEPA filter — I'm hiding it in the storage area under the printing machines);
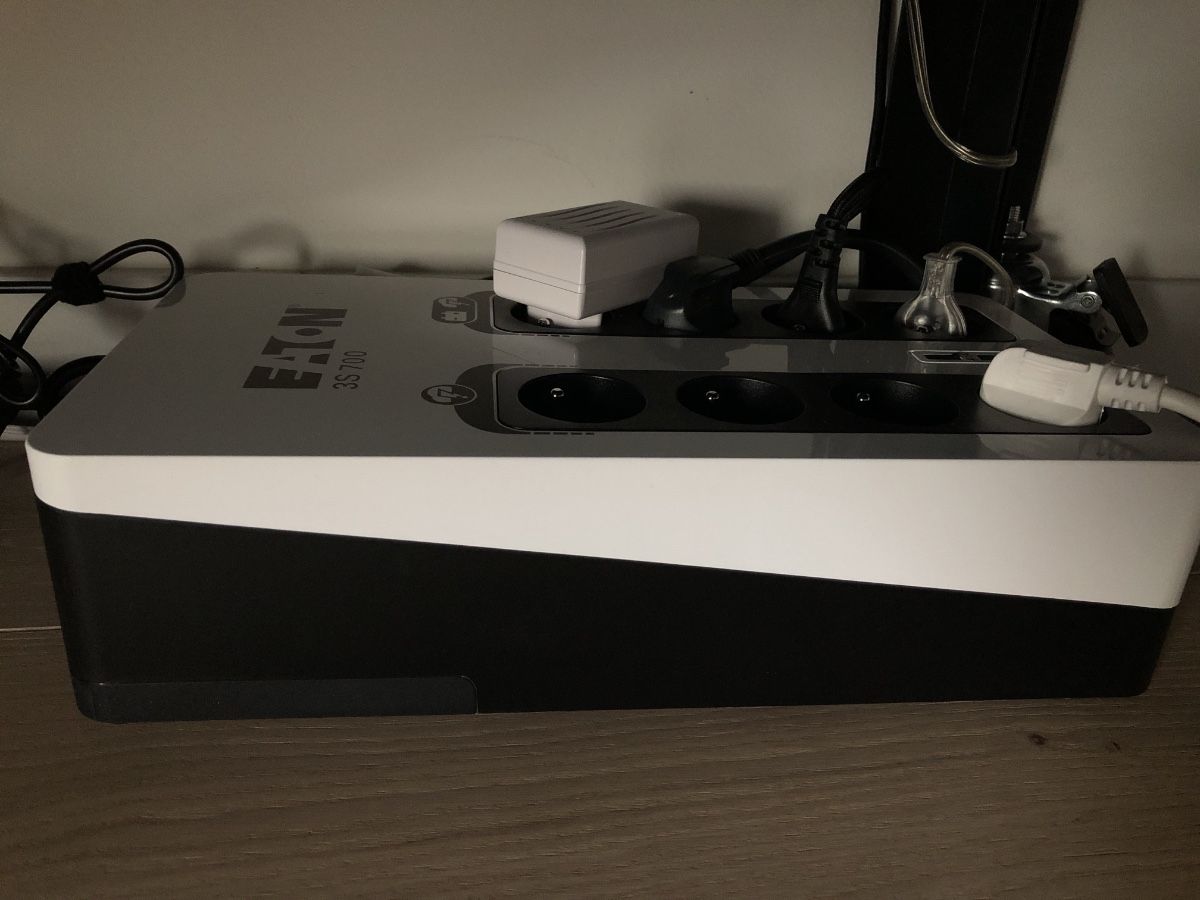
- 1x EATON 3S 700 Off-line UPS (protects your expensive printing equipment against power surges, and provides backup power to your Form 3 for at least half an hour in case of loss of power; this one fits the maximum theoretical power all 3 machines could consume when running at the same time, as it is capable of delivering 420 Watts of peak power);
- 1x Schneider Electric 5 outlets power-strip with an ON/OFF switch (it is connected directly on the EATON UPS battery-protected outlet, letting you shutdown or power the Form 3, Form Wash, Form Cure and air extractor at once, as all those do not have an ON/OFF button);
3D-Printed Parts
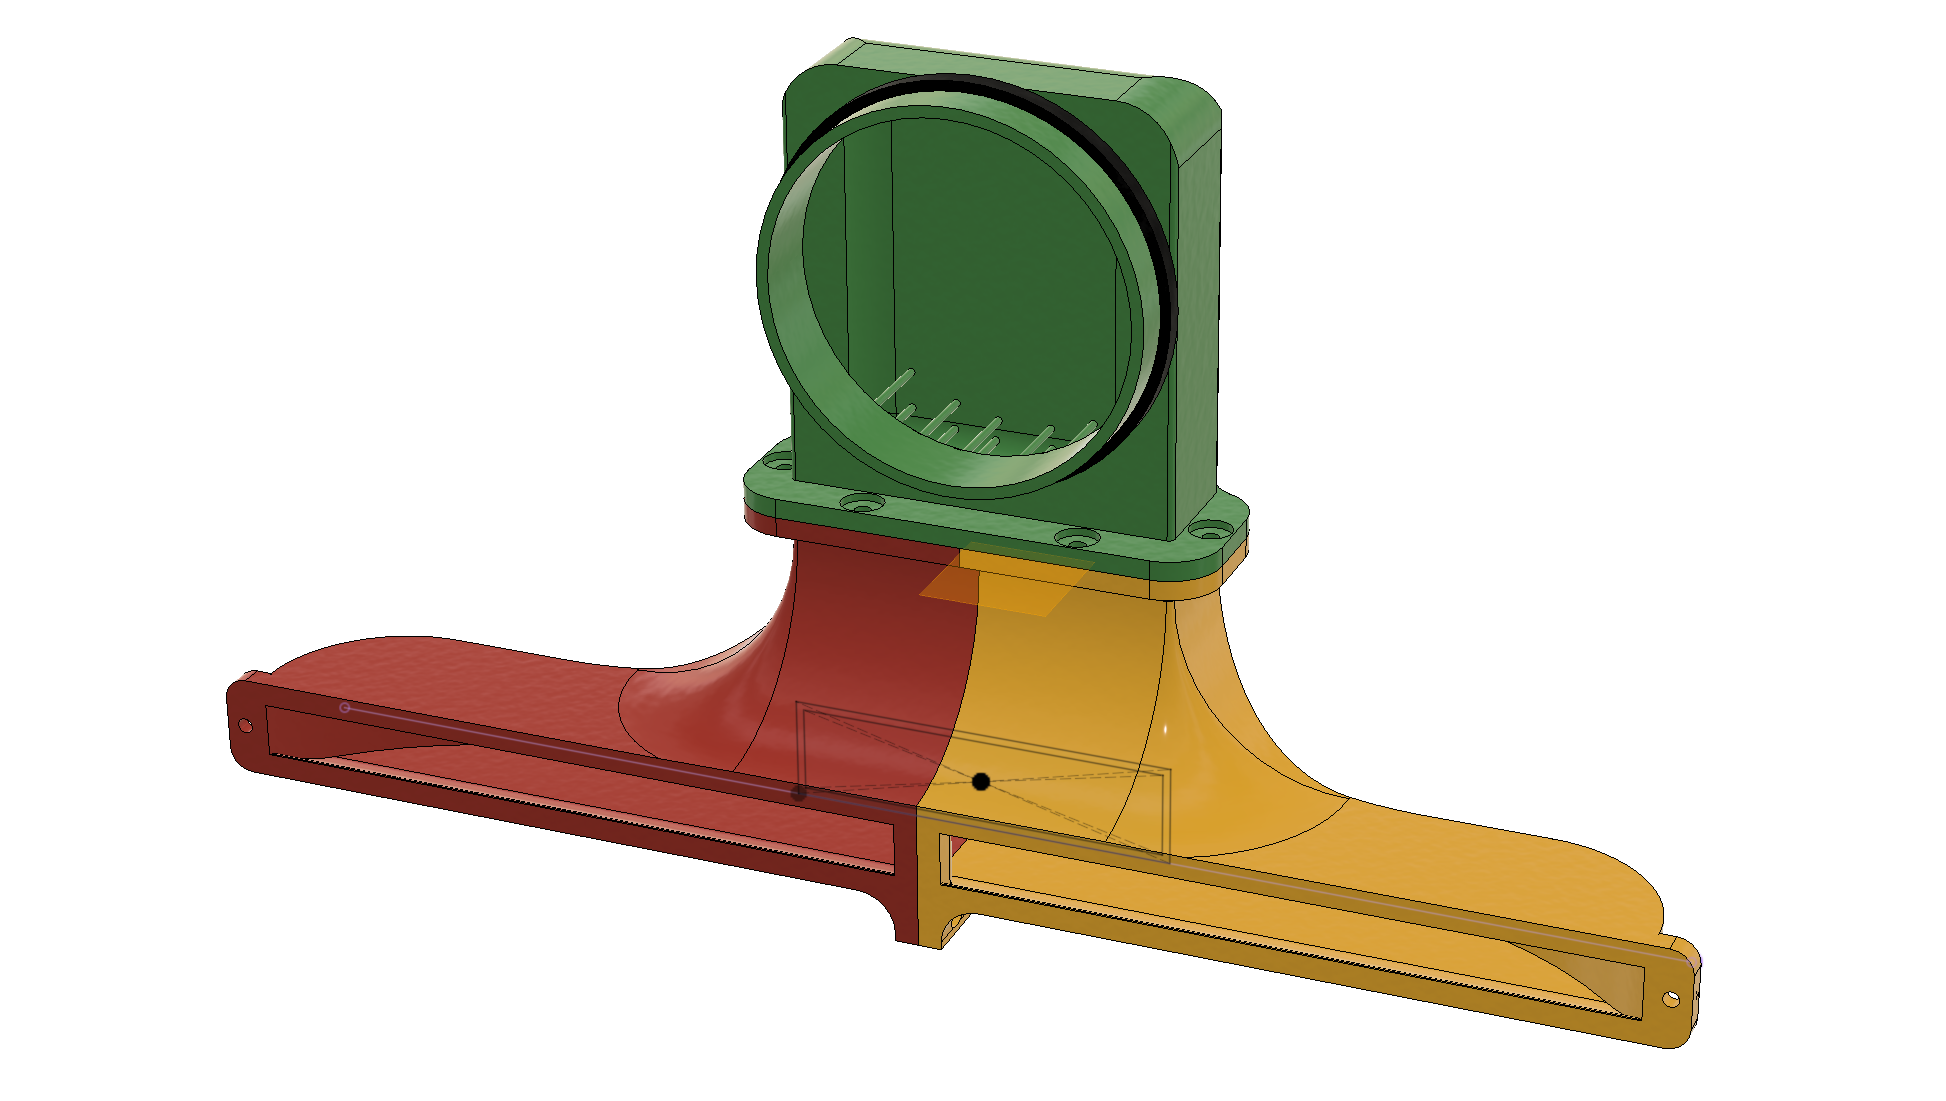
Window Air Extractor
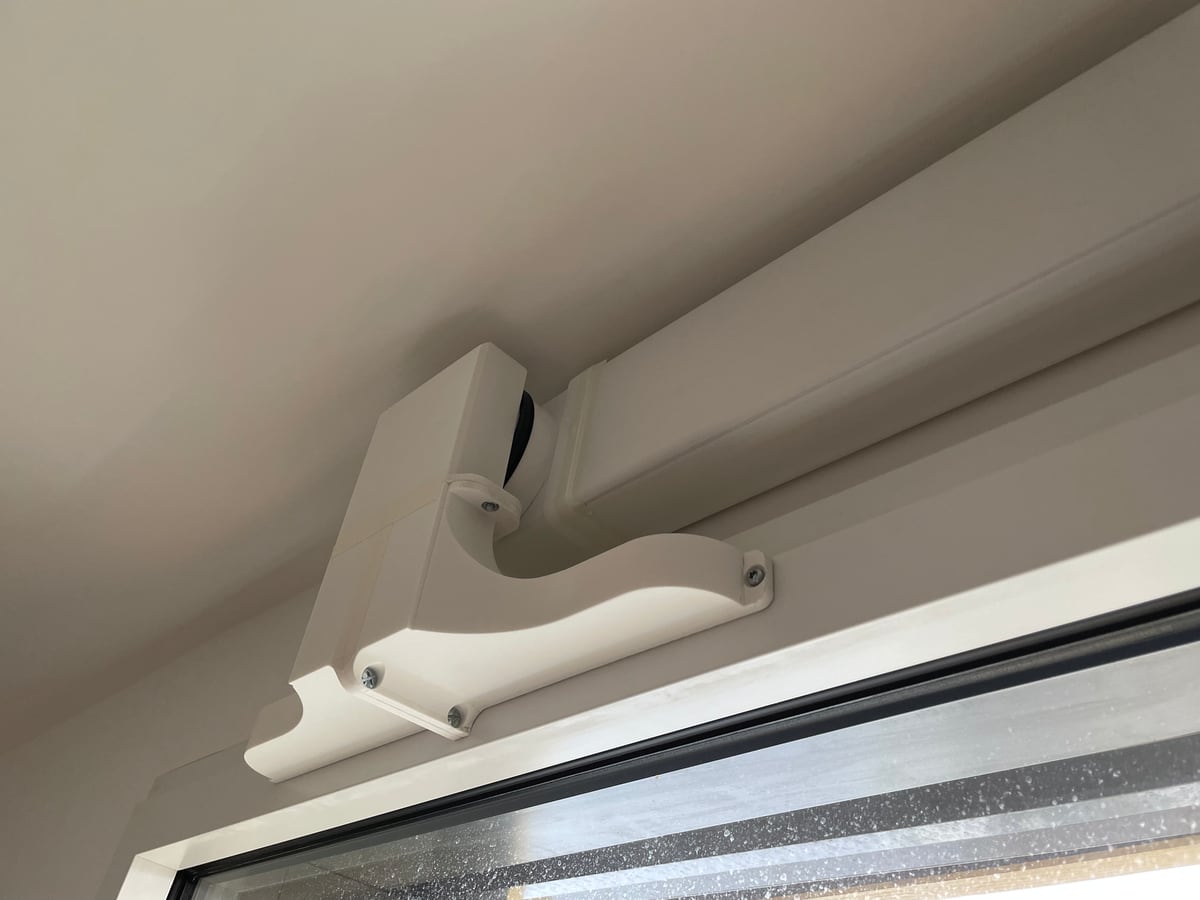
The only part that cannot not be bought on the market is the window air extractor adapter. This part is screwed to the window, and latches with the 10cm diameter duct outlet that blows air out.
As all setups are different, and each window has a size of its own, this part should be custom-fitted using a CAD software like Fusion 360, and then 3D-printed. As it's rather large (mine is around 40cm long), it should be printed in multiple parts, which are then screwed together and sealed against each other using neoprene glue. Screws used are M4 screws, with a bolt attached on the other side. There is a total of 6 screws and 6 bolts. Use short screws, eg. around 3cm long (that is, for cosmetic purposes). Double-check that all joints are airtight before mounting on the window, as any leak at this section will result in spoiled air to be recirculated back in the room. Also, make sure to place a double-sided adhesive tape on the plastic section that touches the window, to seal it.
The three large parts on the scheme below are to be printed on an FDM printer (using PLA as a material is fine, but ABS can also be used for more durability). Those parts have been designed to be printable without any support whatsoever, thus you should disable them in your slicer (I would still recommend you keep the adhesion bed). The red and yellow parts should be printed placed with the longest edge on the Z axis (over the part height), while the green part should lie on the bed with the square edges on the X and Y axis with the duct outlet facing up towards the extruders. Cathedral-like supports have been included in the model, and should not be broken away once printed. I have done 2 prints with different parameters, the one that came out perfect on a MakerBot Method was the following: white MakerBot PLA spool + high-quality presets + 200 micron layer thickness + 25% infill + 0.6mm roof & floor thickness + purge tower disabled.
An o-ring gasket ensures the latch between the window air extractor and the duct exhaust is hermetically-sealed. This o-ring gasket should be printed in a flexible material — I've printed mine on the Form 3 using Formlab's Flexible V2 resin, with success. This print was configured with the gasket laying on the X-Y axis, with minimal height on the Z axis, and a resolution of 50 microns (100 microns is also okay).
Window Air Extractor model:
The "Window Air Extractor" 3D model can be viewed online. I've also prepared a Zip file containing the F3D and STEP CAD sources (download it there), as well as STL exports of all 4 parts. You may rework my CAD model to ensure it fits with your window and duct setup.
If you are looking for a picture of the window air extractor printed and mounted on a window, I've included two below, in the picture section.
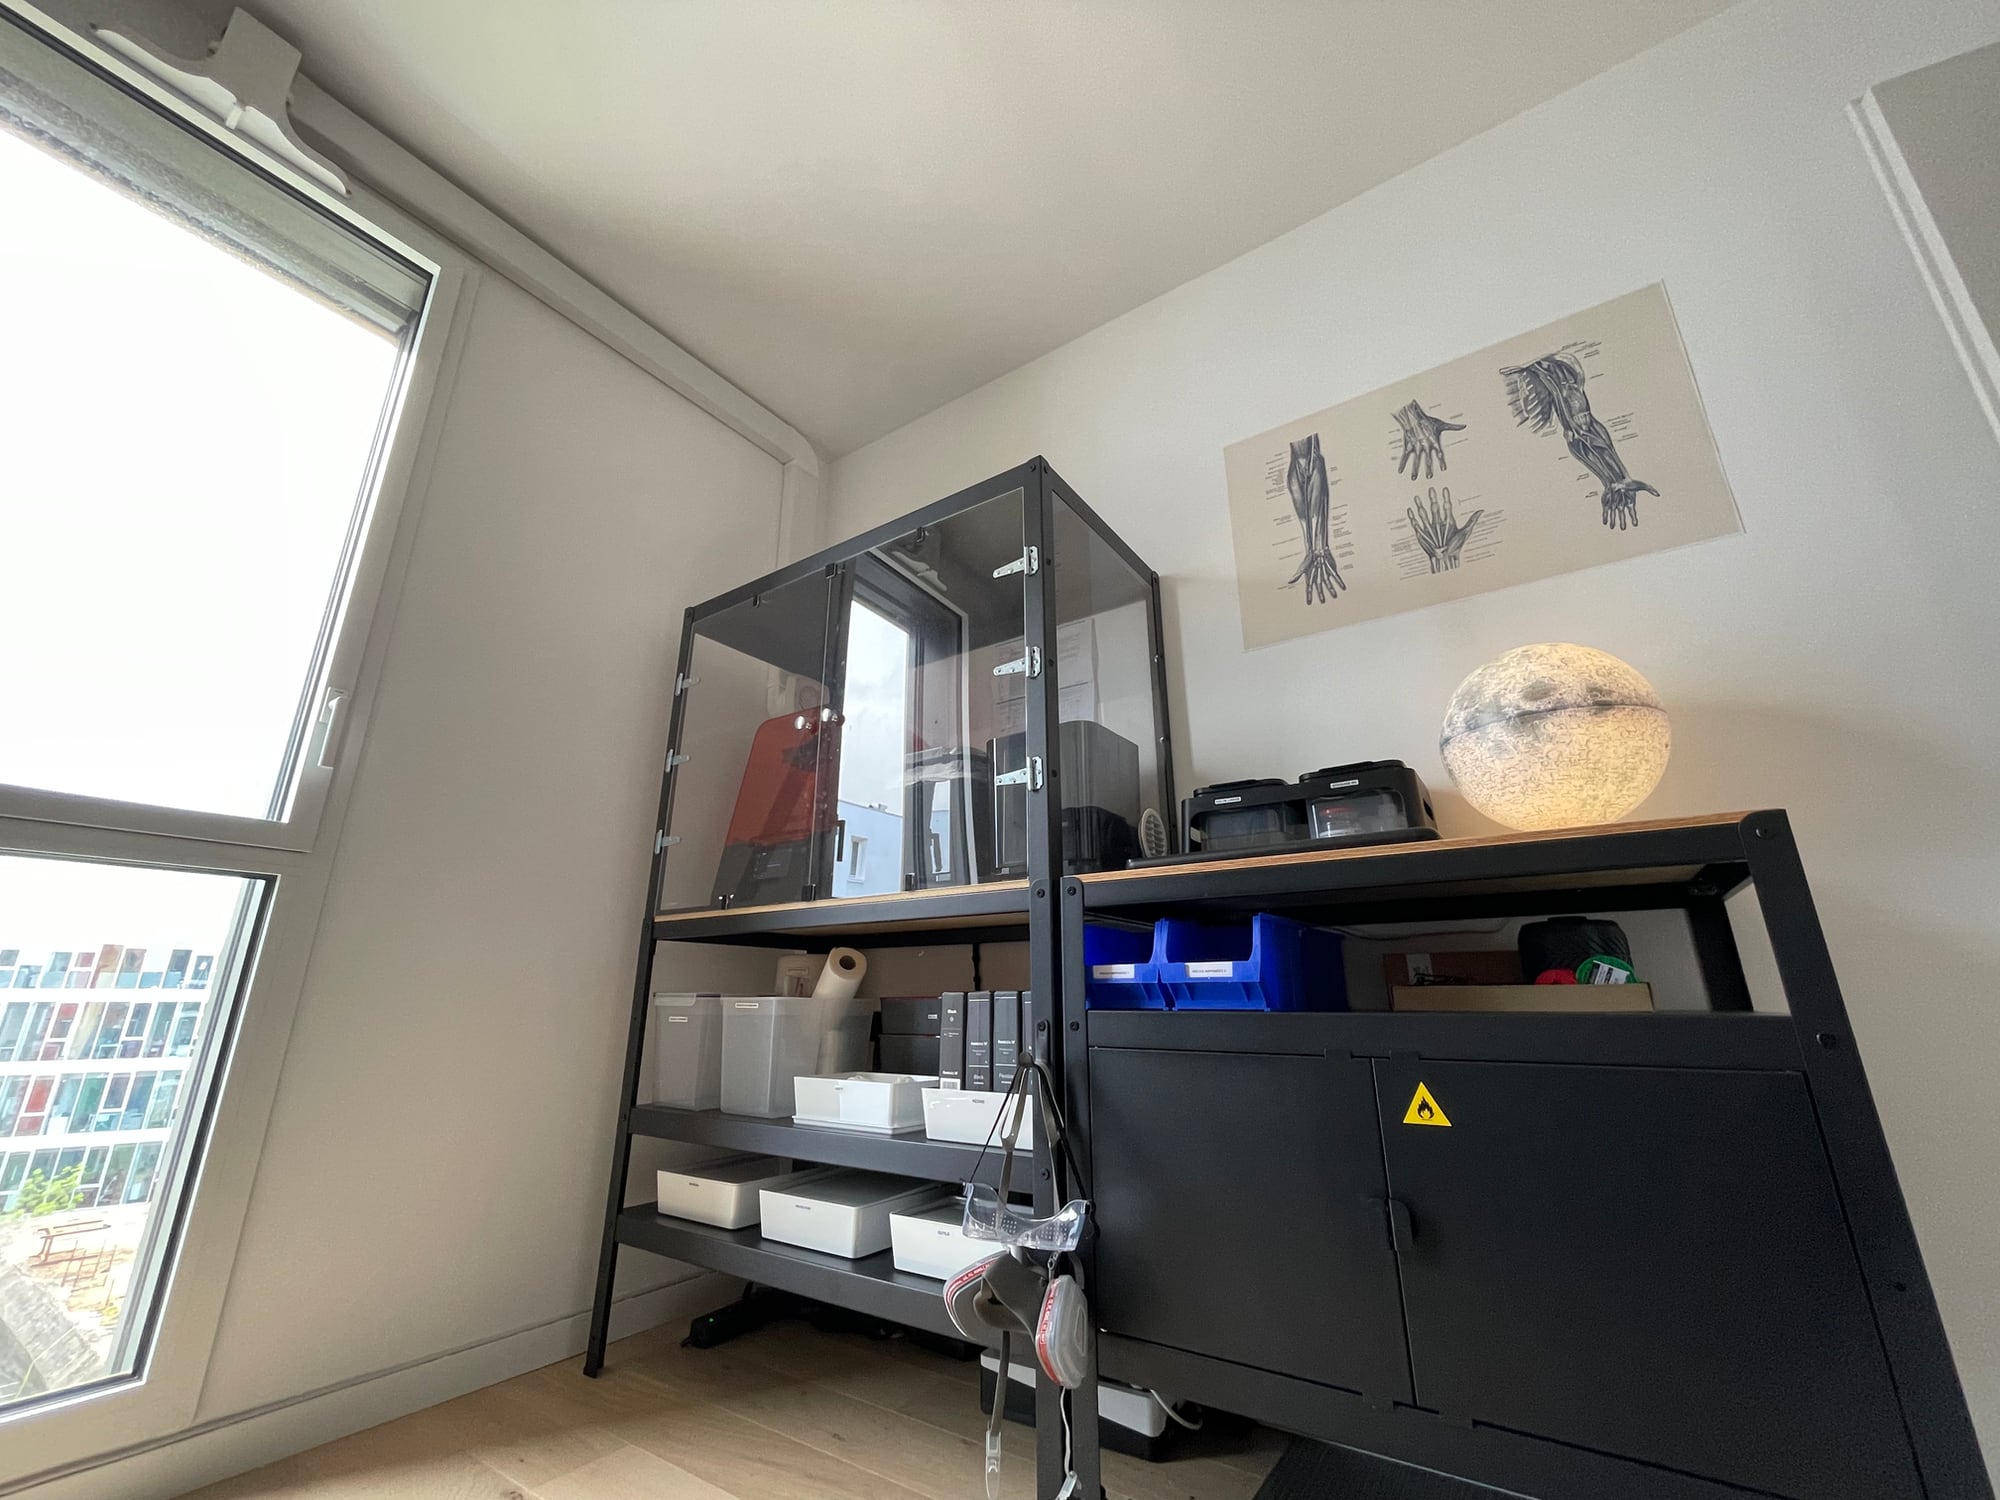
Close-Up Pictures
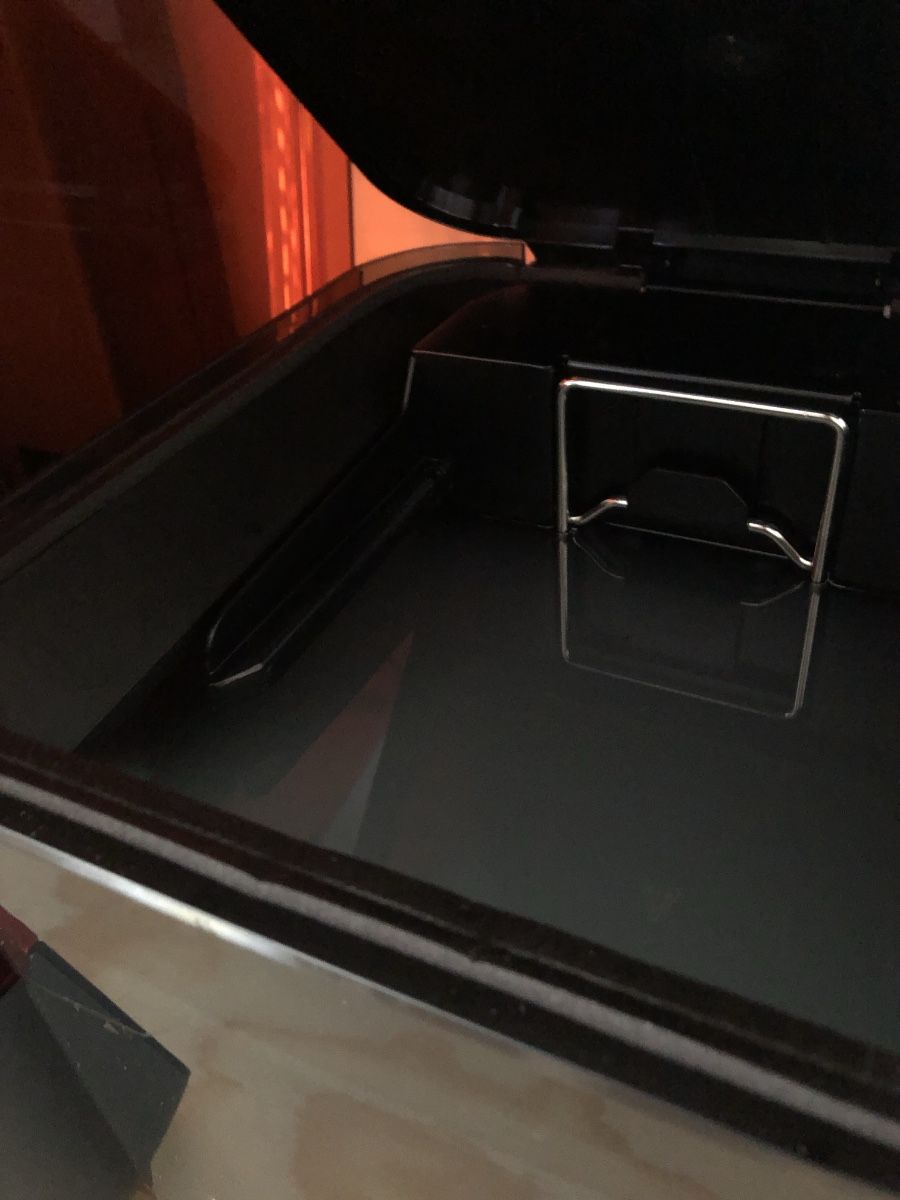
Printing Area
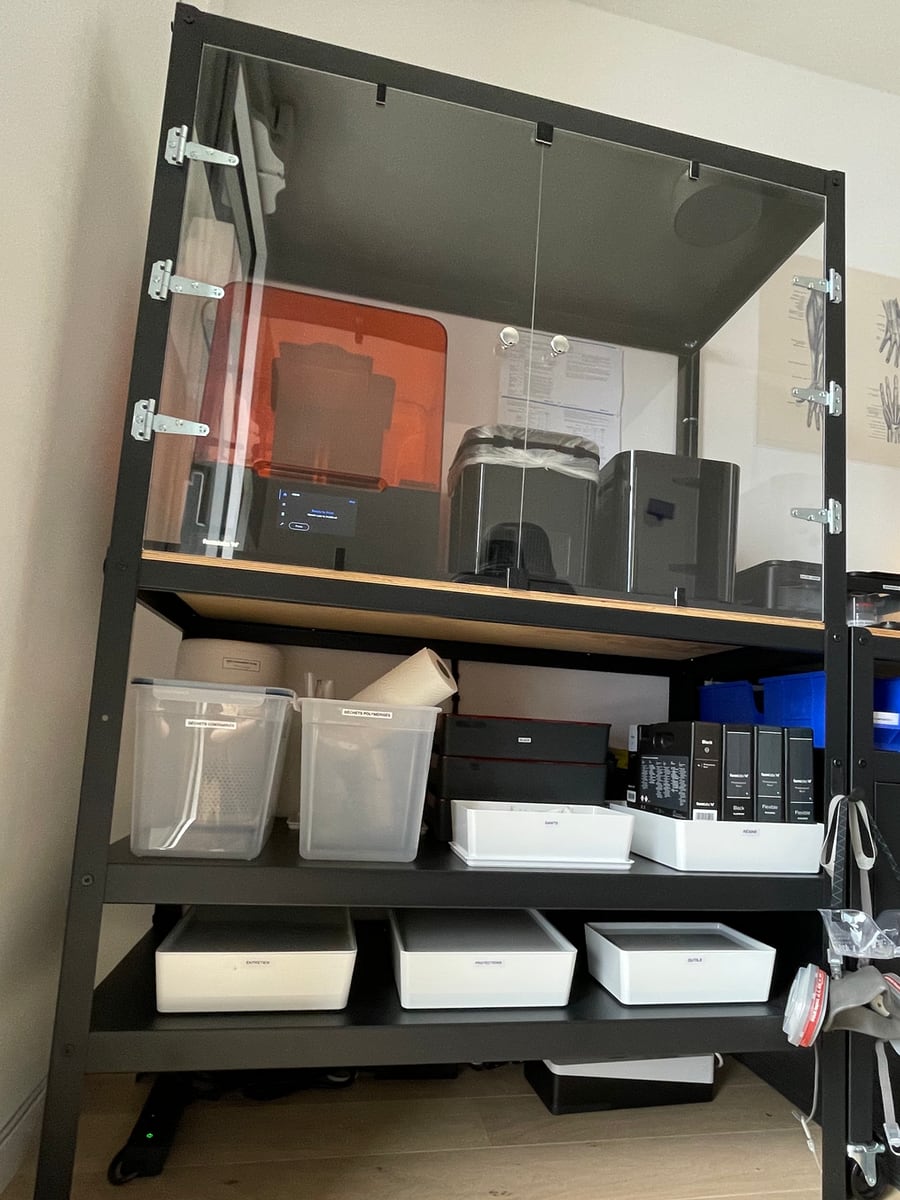
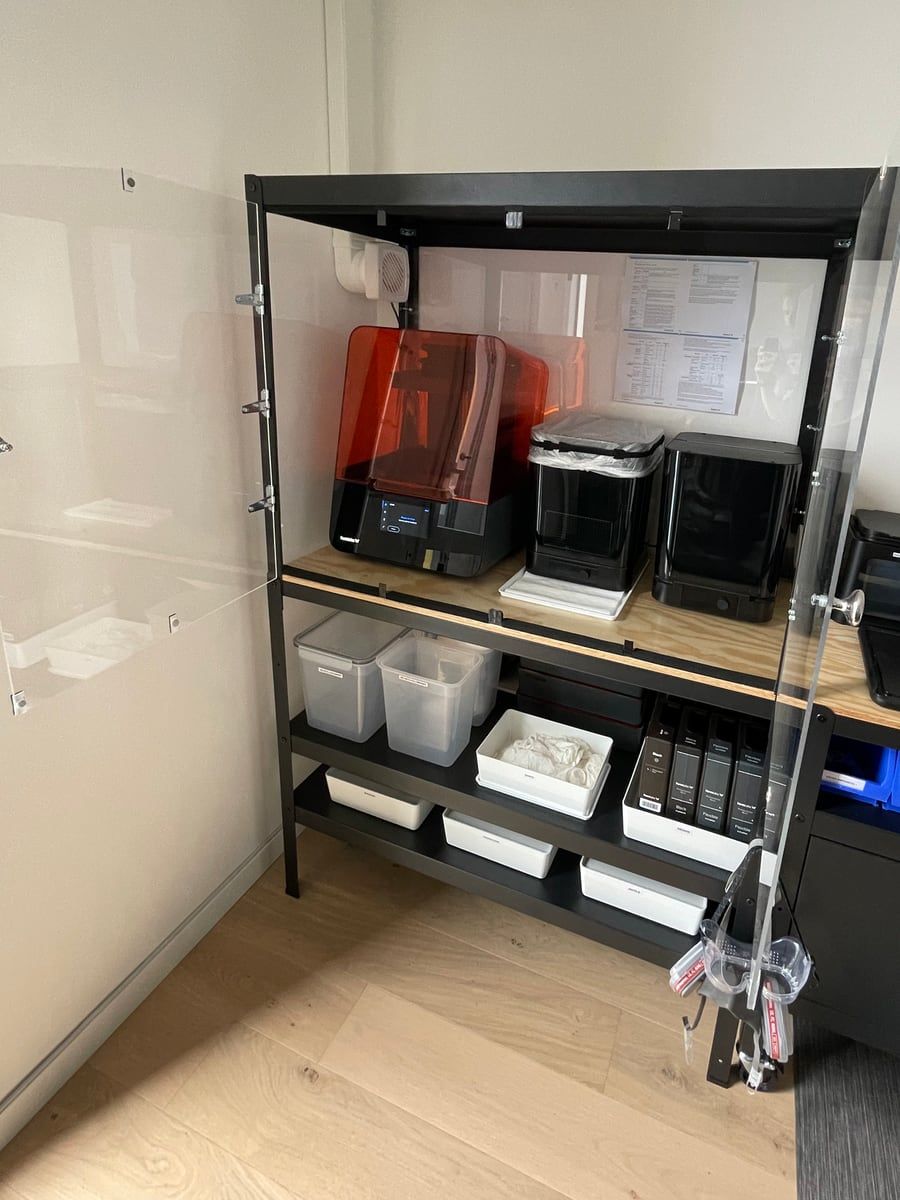
Air Extraction System

Storage Space
Post-Processing Area


Miscellaneous

Closing Notes
I would have paid a lot to buy an existing 3D-printing workstation furniture, which would have included the enclosure itself, the post-processing area, storage areas, as well as all the integrated backup power equipment. Sadly, that's not something we can already find on the market as of 2020. This was the main motivation behind my decision of writing this article and sharing my enclosure design with you.
If you were to build yours, and choose my design, I would love you to share pictures of the finished enclosure that you built with me over email. As well, if you have questions or any issue in replicating it, drop me an email over the same email address. I'd be happy to help!
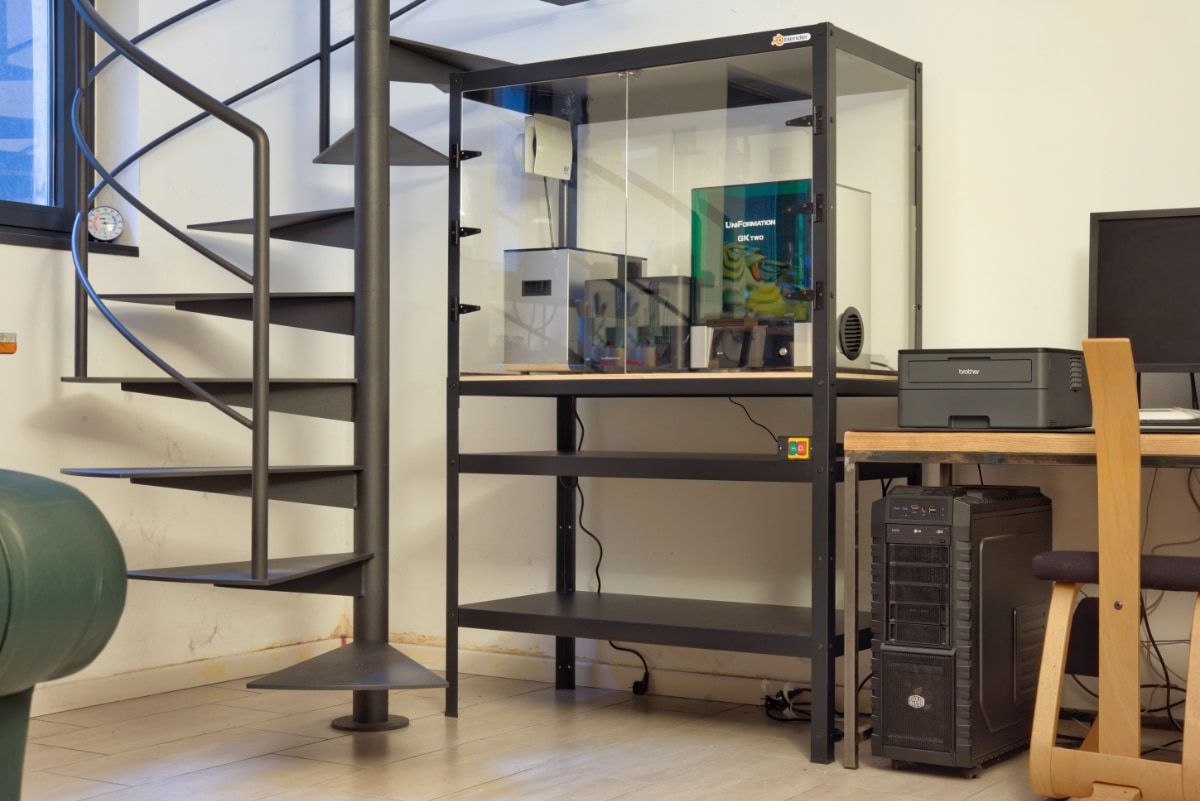
They replicated it
Some people have contacted me to ask me specific questions about my design, as they were building it themselves! I am glad to share pictures of the enclosures that have been built by other people (with their permission).
🇫🇷 Written from Nantes, France.